When working with small to large objects, placing supports 1 by 1 is time-consuming. Trying to optimize support placement and quantity often demands starting over. On larger objects this can literally cost you hours!
With Support Projection, you can optimize and support an entire surface in seconds.
Key Features
- Independent Infill and border settings
- Pattern of Infill
- Auto Tag Border and Infill for easy post alterations
- Independently Select support presets for border and infill
- Island Detection
- Double Row around the border for extra security on larger projects
What is Support Projection
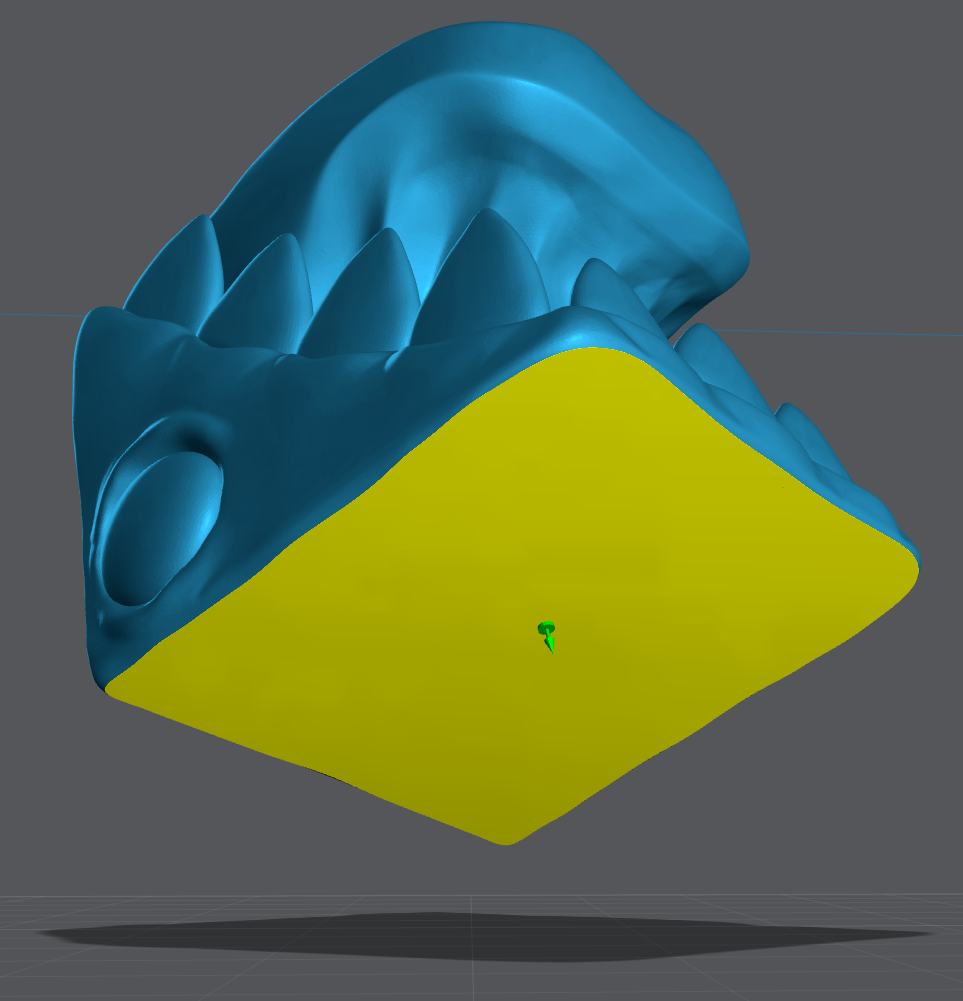
It’s important to mention that while Support Projection is a very powerful tool when used correctly it’s not a replacement for Auto or Manual supports. This is because Support Projection won’t add supports to complex models or islands above the projected surface, the yellow area. For more complex shapes it’s best to understand the other tools Lychee Slicer offers.
Linked Articles
Think of this yellow area as a light source, Projecting a focused beam of light out of your model. The green arrow shows the direction of the Projected light.
The support tips will grow from this entire projection, then the auto support algorithm will find a path and place the support bases.
This all takes place in the blink of an eye, according to settings you control! Continue reading to learn how to use these settings.
How to use Support Projection
To get started using Support Projection
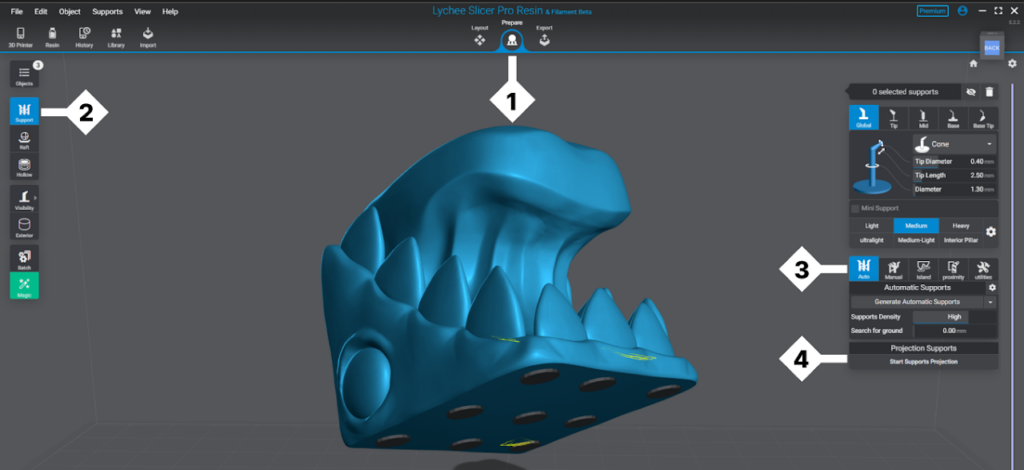
Open Lychee Slicer version 5.2 or above, navigate to:
1. Prepare > 2. Support > 3. Auto. With the model you want to support selected, click 4. Start Support Projection
Select the surfaces you wish to support.
Three tools to help you select the surface.
Surface Crease

Select a surfaces and any adjacent surface at an angle no greater then what the tool is set to.
Example if the Surface Crease tool is set to 75°, it cannot also select any adjacent surface that is angled at 76° or greater.
Holding CTRL will deselect surfaces based on the angle the tool is actively set.
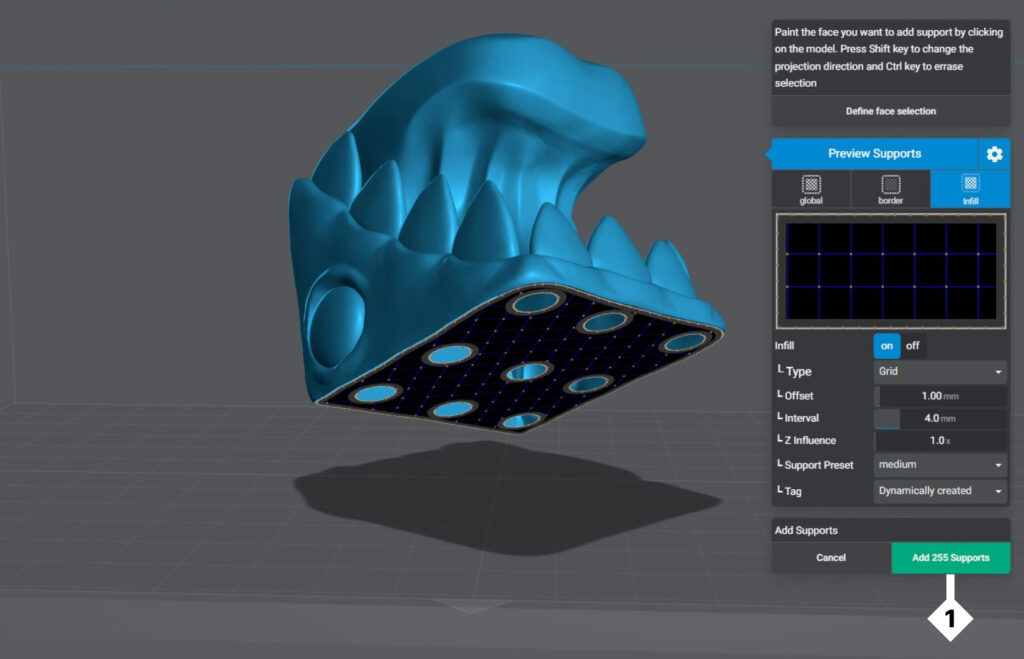
Preview Supports
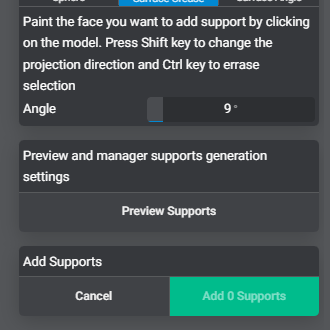
Once you’ve highlighted the surface you wish to support, click Preview Supports. This will bring up the Projected Support settings menu.
Become familiar with Projected Support settings
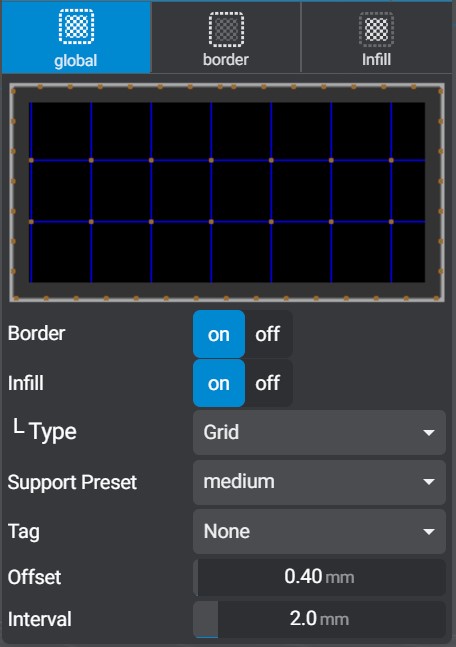
Global
The global tab will overwrite the border, or Infill tabs. This tab is intended to be easy to get you going fast, while providing you with great control.
Caution: Anything with (Shared with Global) in the documentation below is a shared value. Changing this in any tab will overwrite that value in the others tabs.
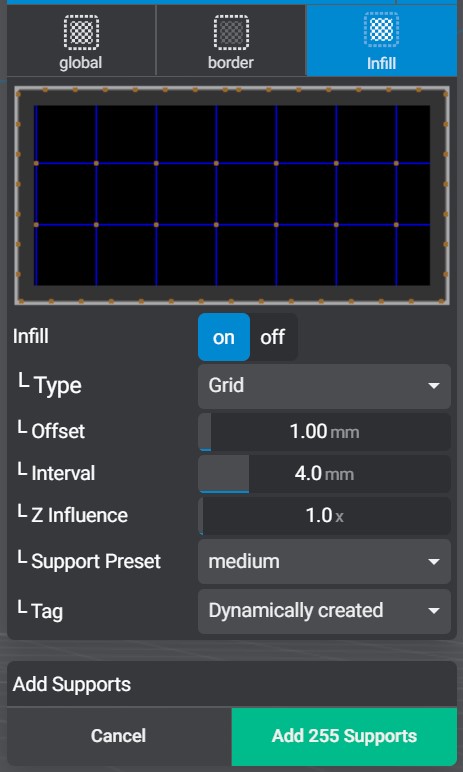
Border on / off
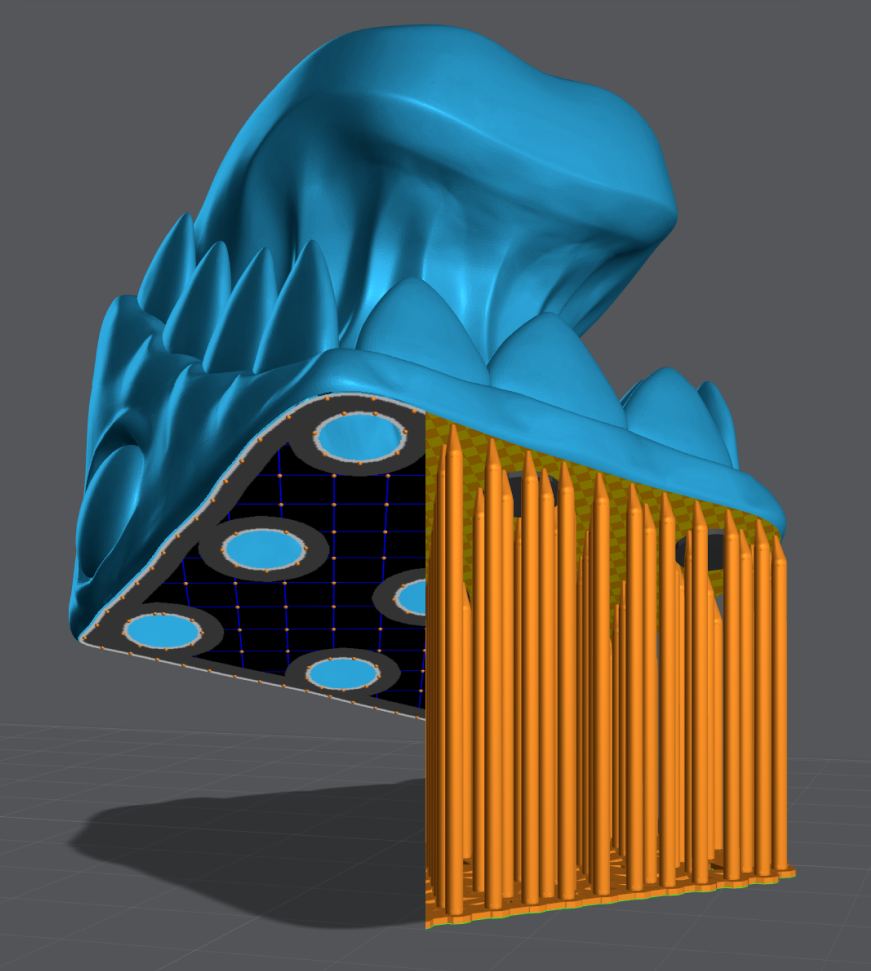
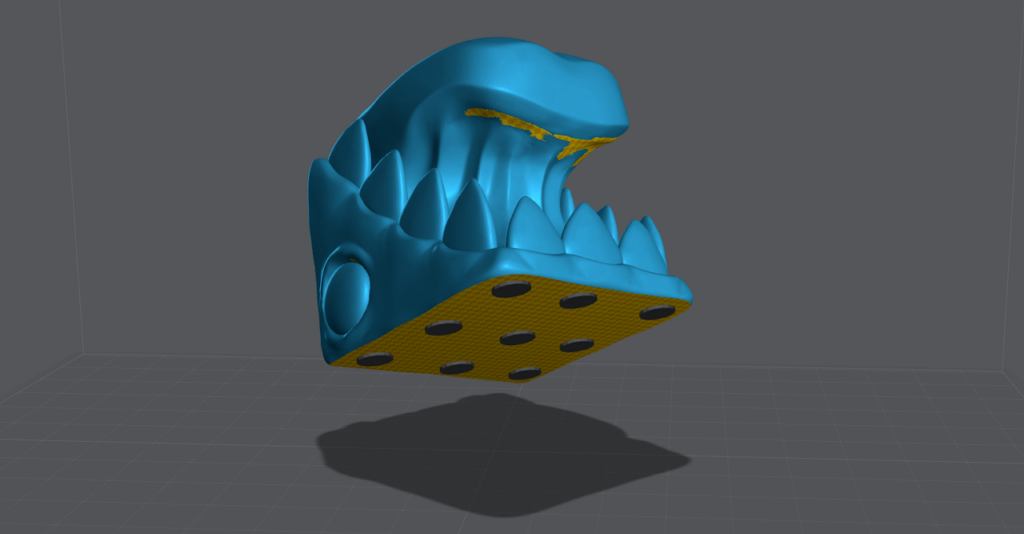
- The ring of supports placed around the perimeter of the selected area. This perimeter will include any hollowing holes. Visually represented by the light gray border. The golden dots on the gray border represent support placement.
Infill on / off
- The supports to be placed inside of the border. Black squares represent the space between supports. The orange dots on the blue lines represent support placement.
Type
- This is the pattern of Infill, there are three options to pick from.
- Grid
- Concentric
- Random
Support Preset
- Select any of your support presets for the tool to apply.
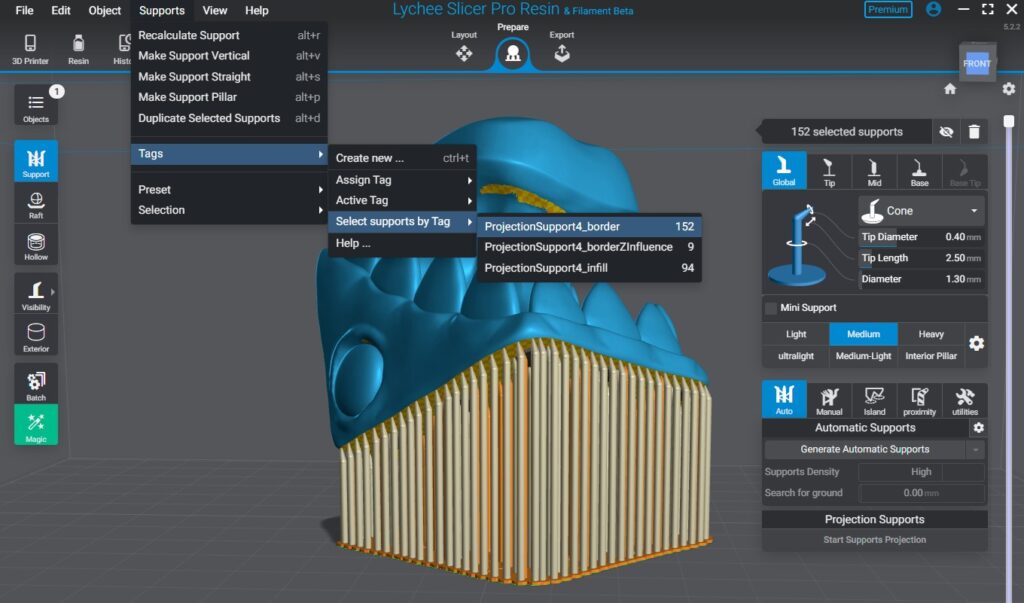
Tag
- Auto tagging creates an easy way to select and interact with the supports you’re about to generate, there are two options.
- None – Select this option if you don’t want to auto tag the supports generated.
- Select from any existing tag.
- Dynamically created – This will create up-to three tags, then apply that tag to generated supports. The tags will be named as follows.
- projectionSupport1_border
- projectionSupport1_infill
- projectionSupport1_borderZInfluence
Offset
- A gap between the outer edge of the yellow highlighted selection and where the border starts. Visually represented by the dark gray zone between the light gray border and the black box grid.
Interval
- The distance between each supports, or the support density of both border and Infill.
- Setting the density of infill independently of border is highly recommended. This is because the border will often require more supports than infill. This can be done using the other two tabs border and infill.
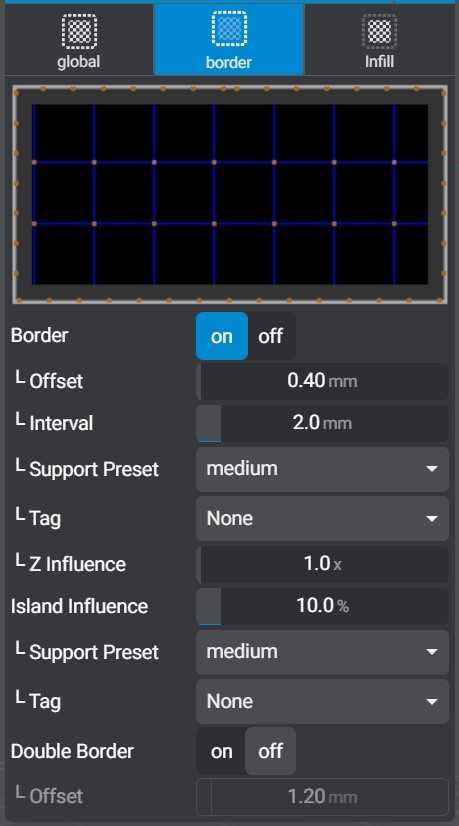
Border
These are advanced settings to fine tune border supports. While some of these settings are found under Global, there are some new ones to more advanced users to really fine tune this tool.
This tab controls two types of Auto supports, Border and Island.
Settings for Border
Border on / off (Shared with Global)
- The ring of supports placed around the perimeter of the selected area. This perimeter will include any hollowing holes.
Offset (Shared with Global)
- A gap between the outer edge of the yellow highlighted selection and where the border starts.
Interval
- The distance between supports, or the support density of only the border.
Support Preset
- Select any of your support presets for the tool to apply to the border.
Tag
- None – Select this option if you don’t want to auto tag the supports generated.
- Dynamically create/apply the tag (projectionSupport1_border) to border supports.
Z Influence
- Reduce the density of border supports as surfaces are further away from the build-plate.
- Higher Values will increase the spacing between supports as Z height raises.
Double Border on / off (Skipping to the bottom)
- When “on” is selected it will add a 2nd border around the object. This is helpful for very large objects that need a little extra for high rates of success, but you don’t want to overly increase the density of the infill.
Offset
- A gap between the first and second border if double border is on.
Settings for Islands
Island Influence
- Density and likelihood that an island will receive multiple supports.
Support Preset
- Select any of your support presets for the tool to apply to islands.
- None – no tags will be created or applied.
Tag (Island Influence)
- None – Select this option if you don’t want to auto tag the supports generated.
- Select from any existing tag.
- Dynamically create/apply the tag (projectionSupport1_borderZInfluence) to island supports.
Infill
Like the border tab, the infill tab shares some settings with global while offering advanced settings fine tune infill supports.
Infill on / off (Shared with Global)
- The supports to be placed inside of the border.
Type, the pattern of the Infill (Shared with Global)
- Grid
- Concentric
- Random
Offset
- A gap between the border and the infill. – Not the edge of the model and the border as discussed in the border tab.
Interval
- The distance between supports, or the support density of the Infill.
Z Influence (Shared with Global)
- Reduce the density of infill supports as surfaces are further away from the build-plate.
- Higher Values will increase the spacing between supports as Z height raises.
- Cant be used on Random
Support Preset
- Select any of your support presets for the tool to apply only to infill.
Tag
- None – Select this option if you don’t want to auto tag the supports generated.
- Select from any existing tag.
- Dynamically create/apply the tag (projectionSupport1_infill) to infill supports.
Last updated on
Tags: Resin