Introduced in version X – Available All Versions
Manual Supporting – Free Version
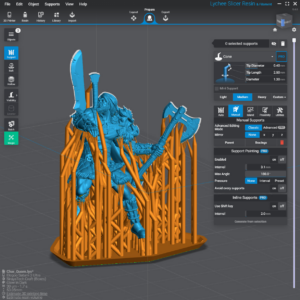
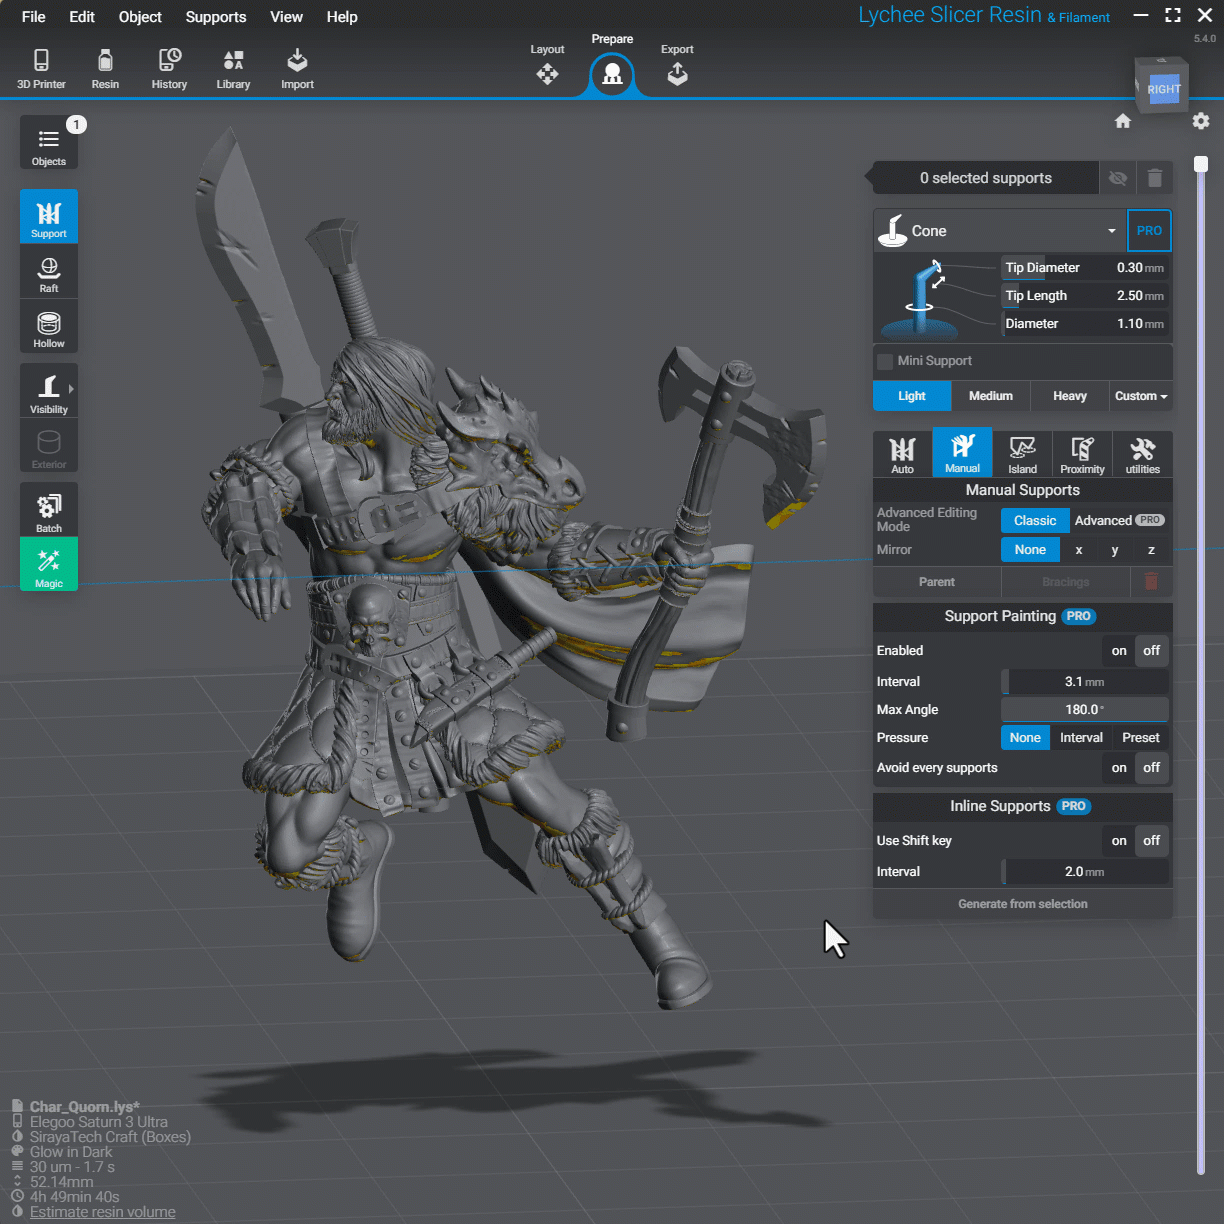
Used to modify the supports on a .lys or .lyt file. Add supports on any supported 3D file.
Key Features
- Add / Remove supports
- Add /remove Bracings
- Alter the contact portion of the tip and base of the support
- Scale the shaft and/or tip of the support.
Use Cases
- Add supports to a section of a print that keeps failing
- Modify the supports in an area that’s leaving excessive damage
- Add or remove supports if you scale the model up or down.
- Adjust supports if you adjust the rotation of a model.
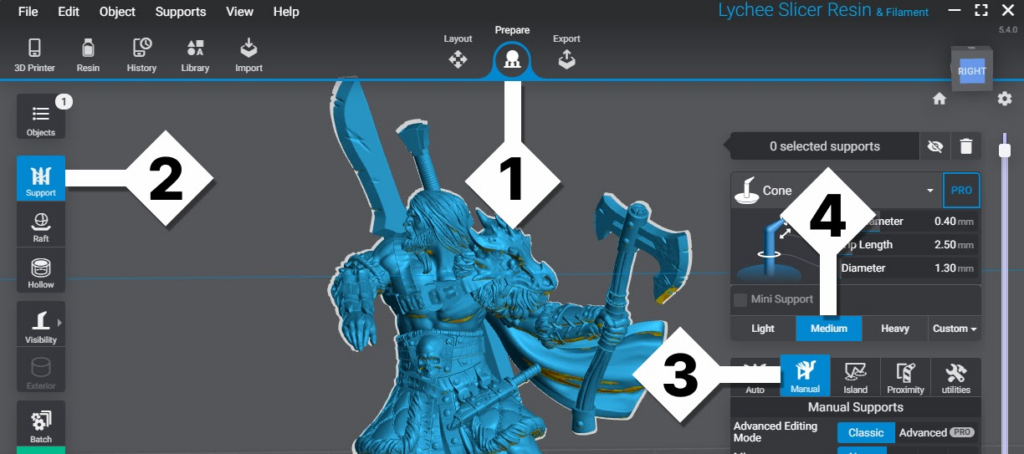
To get started using Manual Supports
Open Lychee Slicer, navigate to:
1. Prepare > 2. Support > 3. Manual. With the model you want to support selected, > 4. select a Preset.
Custom Presets
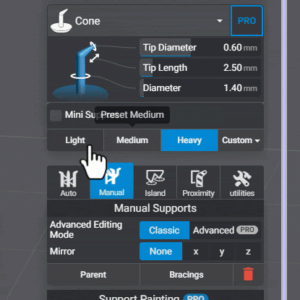
Light, Medium, Heavy
With Lychee Free you get three presets you can use – Light, Medium and Heavy.
For each preset, you can adjust:
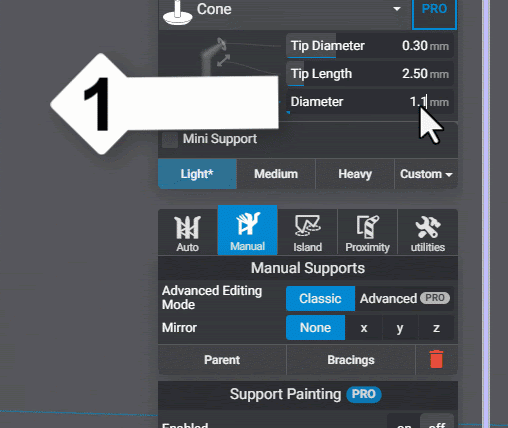
- Tip Diameter is the size of the point that will make contact with the model. It’s best to find a good balance of quantity and size of supports for the best results.
- The larger the diameter, the more strength the tip will have to hold onto the model. This will also leave a much larger impact site on the final product.
- Too small and there won’t be enough strength to hold during the print causing the supports to fail.
- Tip Length is the length between the main support shaft and the end of the tip.
- Lychee will try to angle the tip so that it’s coming off of the model at a proximity of a 90-degree angle. The length of the support tip can be very important to the failure or success of this.
- For complex shapes you may find yourself adjusting this value after placing a support to find the best angles.
- Diameter is the diameter of the support shaft from the base to the tip.
- It’s best practice to set the diameter to be slightly thicker as you increase the tip size. This can make it easy to visually identify each support type.
Override Presets – Free
With Lychee Slicer Free, you have access to three presets with limited customization.
Lychee Slicer Pro gives you three additional presets in the Preset Library and over 17 additional customization points!
To customize your presets, first enter new values under
- Tip Diameter – Tip Length – Diameter
Important! It does not matter what pre-set is highlighted in blue. - Click on the Custom dropdown
- Select Override Preset (In this example, we select ‘Override Preset Light’)
You can also reset supports to defaults – With Pro, you can also export/import presets.
A Strong Foundation
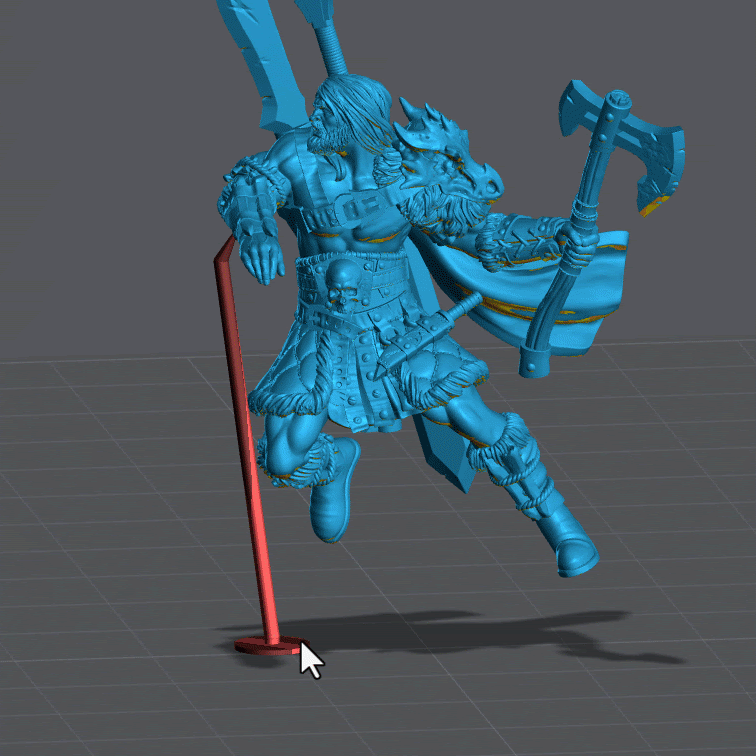
- Using the slider on the right, pull it almost all the way down. You only want the bottom major islands visible. In this example, the islands are the feet.
- Select Medium or Heavy. When supporting a Mini, Medium is the max size we will want to use.
- Place Supports on the bottom layers spacing them about 2mm from each other. Place them close to the edges. Take care not to allow the support tips to overhang any edges.
- If you have a downward-facing object, like this shoe, you will want to use three supports for added stability. Otherwise, the object may shift back and forth during the print.
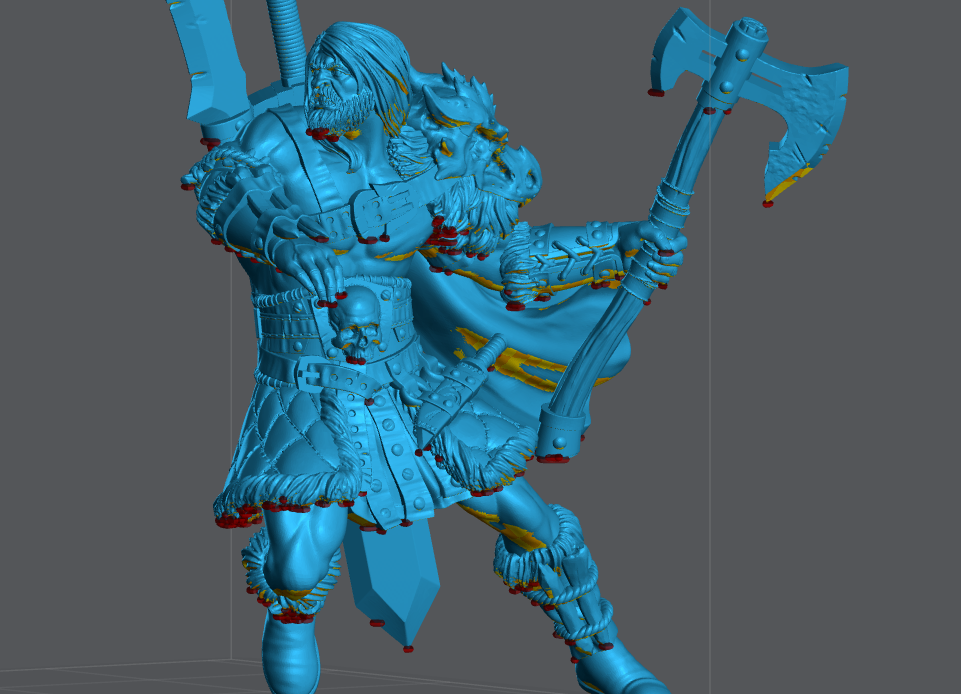
Follow steps 1-4 on any large island. In this example, the hands, weapons and cape.
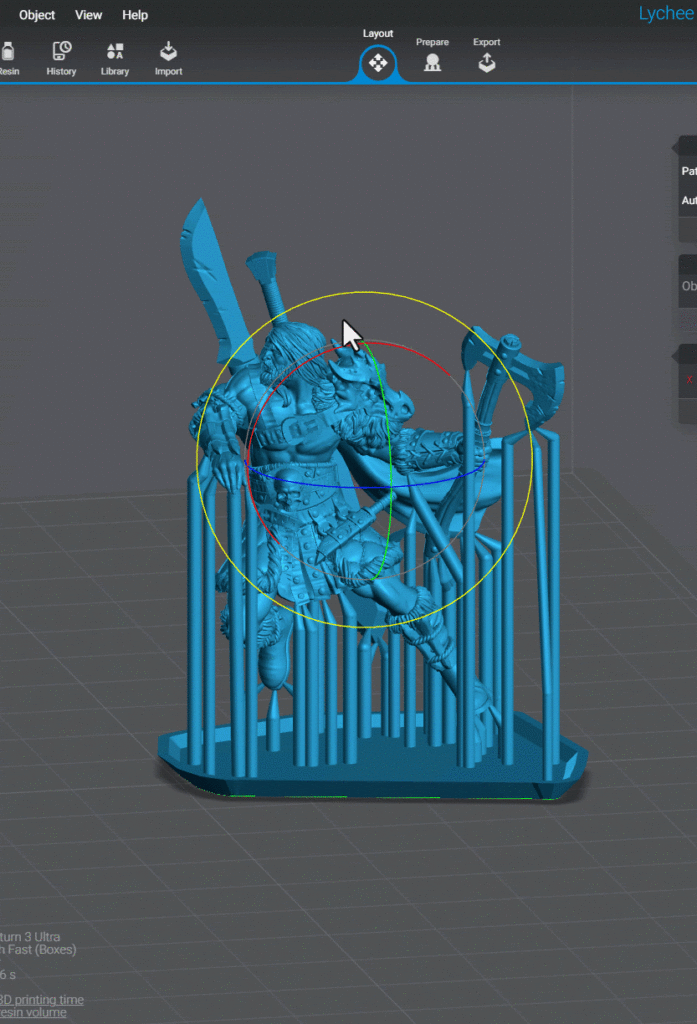
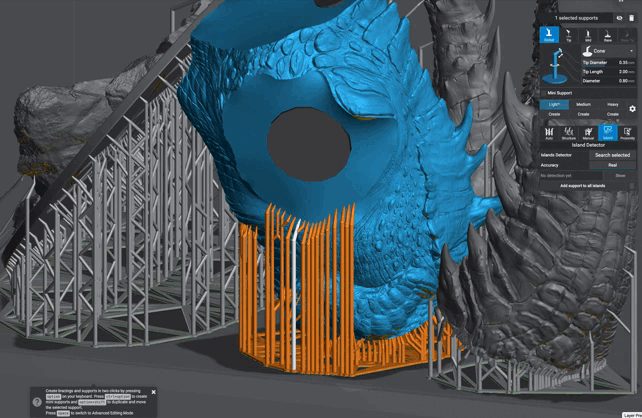
For assistance in finding large Islands, see Island Detector. Run a search using the Fast option to highlight the largest islands. Then proceed to place Medium Supports. Unlock the Real function for the most control with Lychee Pro.
Large Base Islands
It’s important that these supports are large enough, and there are enough of them to hold the core weight of the entire print. If a major section fails, go back to your saved .lys and add a few supports to the failed section.
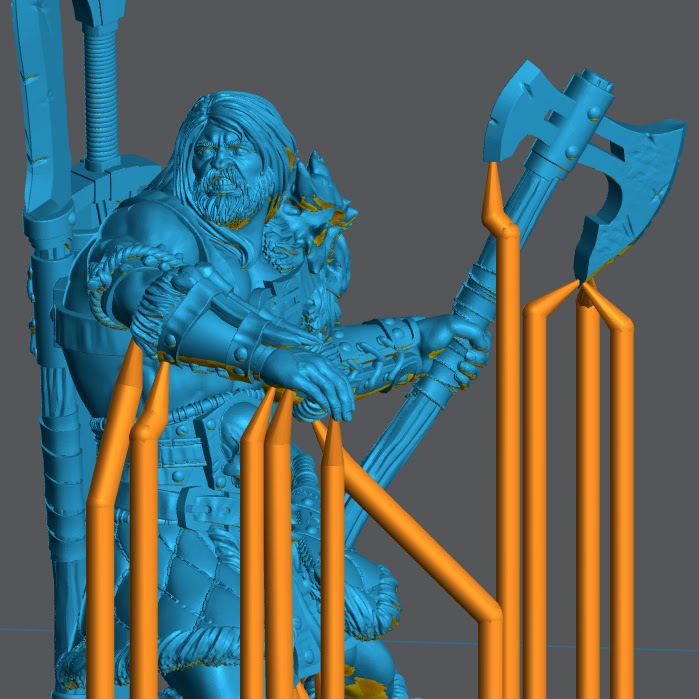
Other Large Islands
Most models will have other major elements that also require medium or heavy supports. On this model, we find the right hand and axe head are large enough that they require to be supported as a part of the main support foundation.

Adjust Supports after placement
Adjusting Support Tips
Hold left-click on the tip of the support, then drag it to the desired location.
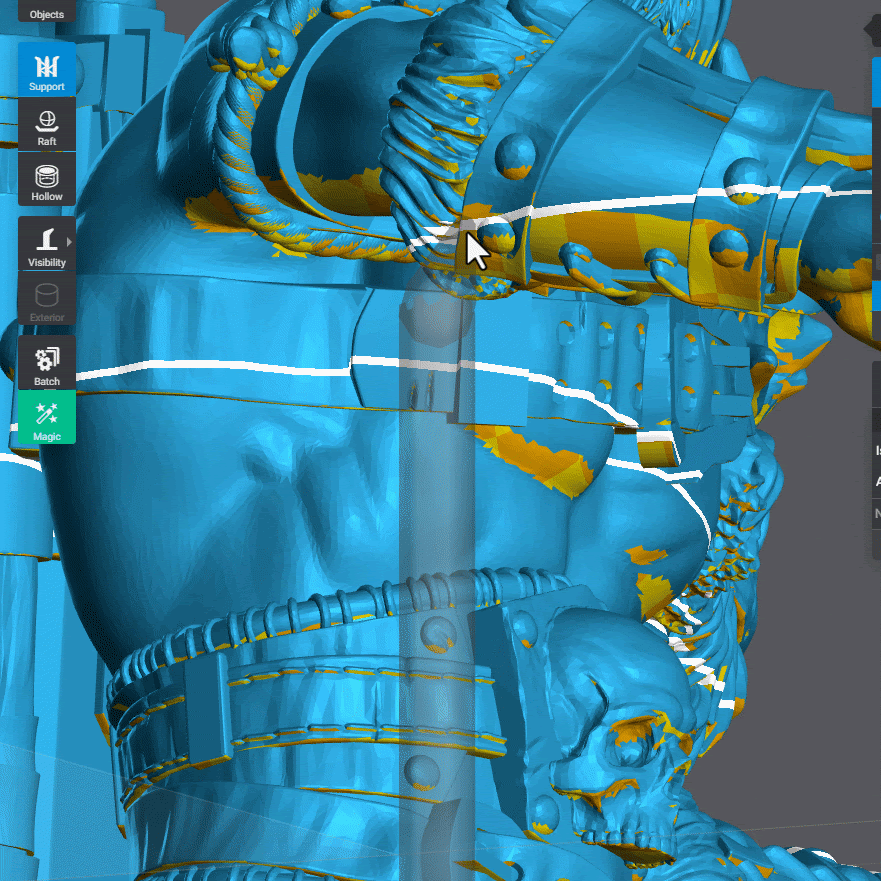
Notice the white rings on the model. This can help you find the lowest point of a section to find the best support placement.
Success Is In the Details
Next, you will need to add supports to smaller islands and details. Light and Mini supports are the best tools for this job.
Lychee Slicer Free allows you to run up to the “Detailed” Island Search. This will help you locate smaller islands. Read more on Island Detector here.
Right click on one or more supports to access 4 support functions
Recalculate Supports
This runs the supporting algorithm against any selected supports. Hover over all support tips anchored at their current location. Very useful to auto-recalculate supports after making several adjustments to the support tip locations.
Pro Tip: This can be very useful if you need to slightly rotate or scale an object. Use caution if you rotate or scale too much, you will need to redo all the supports or risk print failure.
Make Support Vertical
Will make the support shaft vertical, not including the support tip.
Make Support Straight
Will make the entire support straight from the current location of the support Tip, to the current location of the support Base.
Make Support Pillar
Make the entire support perfectly vertical. Starting from the current location of the support Tip to the Build Plate regardless of object boundaries.
Moving the support Base to the same ZY coordinate of the Support Tip.
Pasting Supports params to multiple existing Supports
When you need to change some params of a whole bunch of supports that are already in place, you don’t need to select them all and edit them one by one. You can easily change the param of one of the targeted supports, then copy its params, and paste it onto existing supports to match their setup.
To do that, just use the [CTRL]+C on the newly edited support and then [CTRL]+V onto the selected supports to apply the new setup to.
This applies to all supports settings :
Tip settings
- Tip type (cone, cylinder, cross or cube)
- Point diameter
- Penetration
- Diameter
- Length
- Break point
- Angle
Mid settings
- Section type (cylinder, cross or cube)
- Top Diameter
- Base Diameter
Base settings
- Base type (cone, cylinder, cross, octagon or cube)
- Adaptive base
- Diameter
- Length
- Angle
- Join Cone
- Join Diameter
- Join Length
Base Tip settings
- Base tip type (cone, cylinder, cross or cube)
- Point Diameter
- Penetration
- Diameter
- Break Point
- Length
- Angle
- Is Straight
Extra settings
Is Mini support
Last updated on