Used to calibrate Burn-in-Layers, download here.
Watch this video for instructions (from 9:37).
This can be an intimidating chapter, if you’re not ready for this, it’s 100% ok to skip it and move on to Boxes of Calibration. You can always come back when you’re more comfortable.
This calibration part is designed to do three things in a 15 min or less print.
- Verify that your build plate is level
- Calibrate your Burn-in time.
- Check and set Z-Offset
Comes with a unique version of Boxes of Calibration if you wish to link them together! For funsies only
Why do we care about the Z-offset?
Layer Crushing is when your print is shorter than it should be. This is often because the printer is starting at a height below the set layer thickness.
Layer crushing will mostly work itself out during the entire print. But overall your print will be a tiny bit short. The worst side effects of layer crushing are:
- More damage to the FEP. This is because each layer will be pushed into the FEP over thousands of layers.
- Pushing into the FEP can displace all the resin. This will cause thin or partial layers. This may result in split-rafts. Supports and smaller details to simply just stop printing.
How to use:
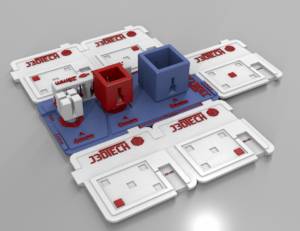
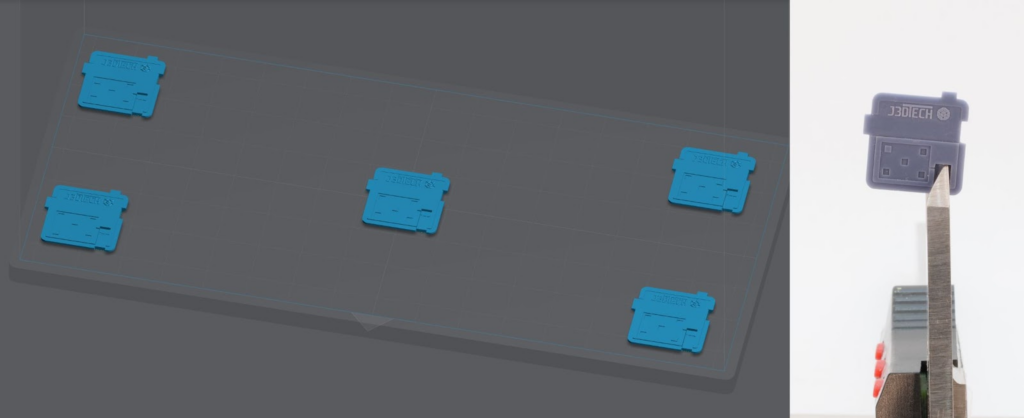
Arrange the 5 flat plates on the build plate in a dice pattern.
Each part has a symbol on it that helps identify where it was on the build plate. Notice the red box in the picture above. Top Left, Top Right, Center, Bottom Left, Bottom Right
Verify that your build plate is level
Do you have digital calipers?
Yes!
Measure the raft on the thinnest part. For now, it does not matter how thick they measure, all that matters is that all 5 rafts measure within 0.15mm.
- If all 5 are about the same thickness, you’re level!!!
- If not, level again and do better.
No!
You can lock the 4 outer rafts using the notches, then use your finger nail to feel for a large height difference. It may sound funny but doing this will get you “close enough”.
- If all 5 are about the same thickness, you’re level!!!
- If not, level again and do better.
Calibrate your Burn-in time
See #2 under the chapter “Burn-in-Layers”
Check and set the Z-Offset
For this you will need Digital Calipers – I’ve tested a few methods to not need them, but precision is required.
Measure the 5 Plates, make notes or write it on the back, remember they are supposed to measure 1mm on the thinnest section.
If they measure UNDER 1mm
- Find the average of the 5 plates
- Refer to your user manual and use the front LCD on your printer on how to set your z-offset.
- Add the average difference to Z-offset
- Print and test again. They should be good!
If they measure OVER 1mm
- If they are over by 0.1 – 0.2mm you’re honestly fine, move on with your life.)
- If they measure greater than 0.4mm
- Refer to your user manual and use the front LCD on your printer
- ONLY remove the difference + 0.1mm or you risk going too low and causing layer compression.
Example. If they measure 1.4mm then only subtract 0.3mm from your Z-Offset. - Print and test again. They should be good!
Last updated on