Download Boxes of Calibration here
Reading the Boxes of Calibration
Now that you have printed your first test print, let’s go over how to read it to tune your resin to your printer. This is where the magic happens.
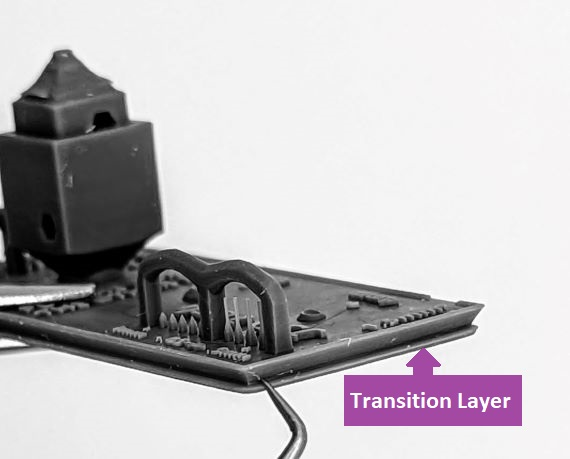
Transition Layer – Elephant’s foot
If the number of Burn In layers is set to high or over exposed (High Exposure Time) they can bleed into your supports and cause supports to break off at the raft for all future prints.
You can visually see if this is the case on your first test print. Look for the transition layer between the burn in and normal layers. You want this Transition Layer to take place within the Base/Raft like the picture below.
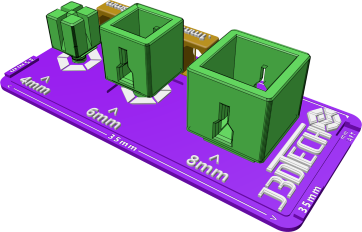
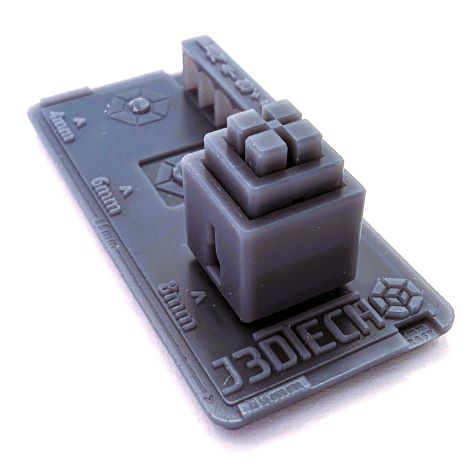
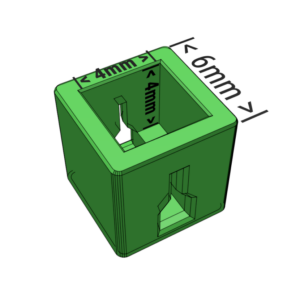
Boxes dimensions
If you don’t have digital calipers
That’s ok, all you need to do is snap off the 4mm and 6mm Boxes. Once they fit inside of each other where you can still pull them apart you’re good to go.
Boxes not fitting is mostly an issue of blooming, blooming is caused by a few major factors.
- Over exposure
- Curing resin in motion
- Dirty/damaged LDC, FEP or screen protector. The printer is in poor working condition.
- Layer elongation or layer crushing.
How to address each issue
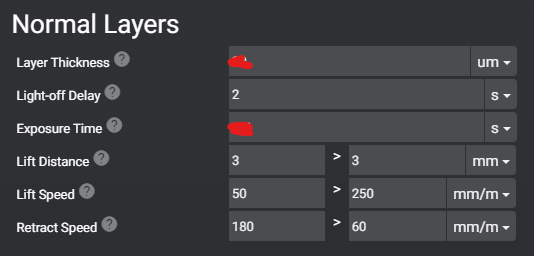
- The boxes are too tight, remove UV exposure time on your normal layers.
- The boxes are loose, add UV exposure time on your normal layers.
- I recommend starting with 1s. As you get closer move to 0.1s changes.
- To resolve, start with 2s of light off delay. This will allow your printer, and resin to come to rest before the UV light turns on. Light off delay is also known as: Wait before print OR Wait after retract.
- Make sure your LCD, Screen protector, FEP are clean and free from major issues. Make sure your printer is well maintained. ACF film won’t be as accurate as nFEP and will damage the smaller pillars making them harder to print.
- Follow the Build Plate Calibration chapter in this guide.
To prevent damage to your FEP: Rotate them 90d and move them by a few mm’s each print. This is true for any file you print more than one time.
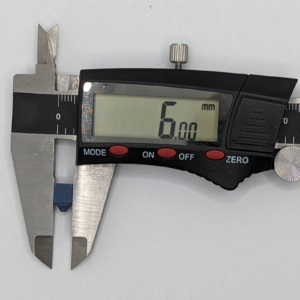
If you have a pair of Digital calipers
Snap off the 4mm and 6mm Boxes, to allow measuring all the boxes easier.
To measure the The inside of each box:
- 6mm box’s inside should measure 4mm x 4mm x 4mm.
- 8mm box’s inside should measure 6mm x 6mm x 6mm.
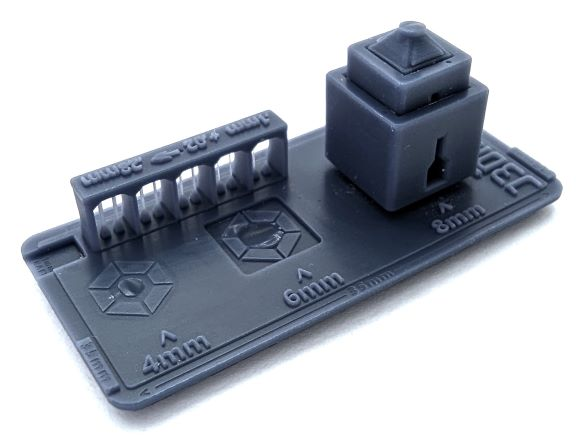
The Pillars of Tensile Strength
Do not not overlook this feature, it can be very powerful as it makes this calibration file two in one, the first of its kind!
Function 1 : True Resin tensile Strength
Once you have reached dimensional accuracy you can now pay attention to the pillars.
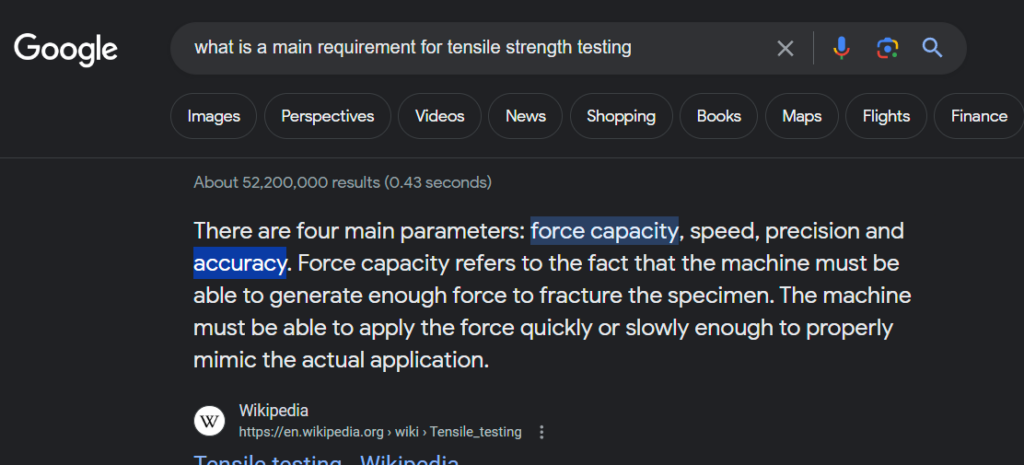
There are several other tests that claim to be Tensile Strength. However they have no method to control accuracy and therefore do not meet the minimum requirements.
- They will tell you the tensile strength of your resin at dimensional accuracy.
- The more pillars the higher the tensile strength.
- This data is very necessary as it will help you understand what sizes will likely fail when doing your own supports, or printing pre-supported items.
- Some high quality resins will print all pillars and retain Dimensional Accuracy. If this is the case you have already achieved Function 2.
What do you do if you’re missing pillars?
- If you missing 1 or 2, you should be ok not all resins can print all 10,
- If you’re missing more than 2 or if you want all 10 try the following.
- Make sure your resin is between 22c and 30c
- Make sure you’re using enough “wait before print” or Light off delay for the resin and printer to come to full rest. 2s may not be enough for your printer, try 3s?
- Consider using a lift speed of no faster than 100mm/m on the first stage of TSMC, or a retract speed of no faster than 200mm/m on the first stage of TSMC and no faster than 60mm/m on the 2nd stage of retract.
- Make sure that you’re not lifting the build plate too much or too little.
- I’ve found that 6mm total of 3mm + 3mm of lift is plenty for 10” printers.
- Play around with all of these settings to find your own perfect spot for your resin, printer and printing conditions.
After you’re finished with Function 1 Save that profile as Boxes or (Dimensional Accuracy).
This profile must be used when printing anything, over supported. This is because a Strength calibration will make supports even harder to remove and cause more damage. It should also be used when doing your own supports for the best end result.
Function 2 : Stress test your resin – Calibrate for Pure Strength !
Stress test your resin – Calibrate for Pure Strength!
I don’t recommend this method but it’s useful when dealing with models that might be under supported.
Note : this is NOT Tensile Strength calibration.
As soon as you add exposure you have added thickness. Now it’s just a stress test. This is true for any test where you add exposure time to get something to print.
- Simply keep increasing Normal UV exposure till all the pillars print.
- If at first, all the pillars print, drop exposure till the smallest pillar fails to print.
- Whatever exposure time was just enough to get the smallest pillar to print is your calibration.
- The boxes will most likely no longer fit. However they will provide feedback of how much accuracy you’re trading for higher success rates.
- Save this calibration as a New Resin Profile, I suggest:
- “Boxes” Tensile Strength
- “Pillars” for Strength
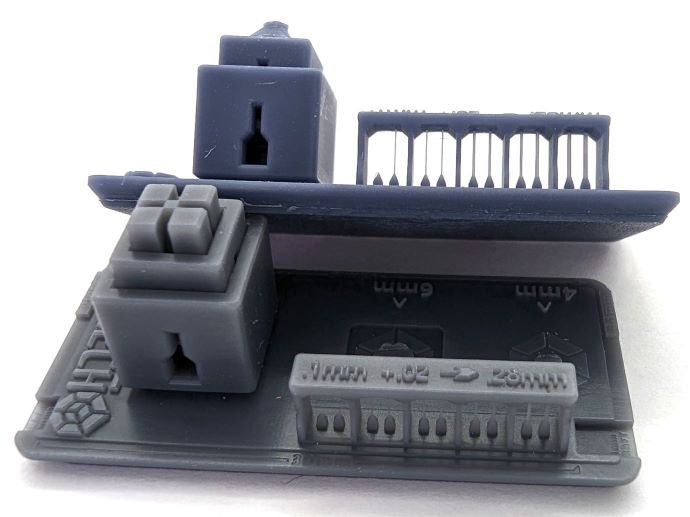
The smallest Pillar is 0.1mm. Each pillar is 0.02mm thicker than the previous going left to right.
Last updated on