For this section I created a video I highly recommend watching.
If you can hollow, you should hollow. Just don’t forget to add drain holes in locations you won’t see in the finished model.
Pros:
- Saves you money, the larger the model the more you save.
- Reduces suction, better quality prints and less failures.
- Reduces cross sections, better quality prints and less failures.
- Reduces the weight of the model, removing stress on your supports.
- Depending on your model can increase its stability on the shelf.
Cons:
- Not placing drain holes at the lowest sections will lead to suction cups. Suction cups will likely cause print failures.
- Badly placed drain holes can make post processing difficult.
- Time to allow the model to correctly drain before removal of the build plate. (If you care to save money)
- If you don’t clean properly resin can and will push itself out of the drain holes during the curing process damaging your cure surface and the model.
- Depending on your model can reduce its stability on the shelf.
- If you forget to add drain holes, the gasses will cause your model to explode. Sometimes with enough force to throw uncured resin 20+ feet.
- Internal supports may be required.
Hollowing Settings
Thickness
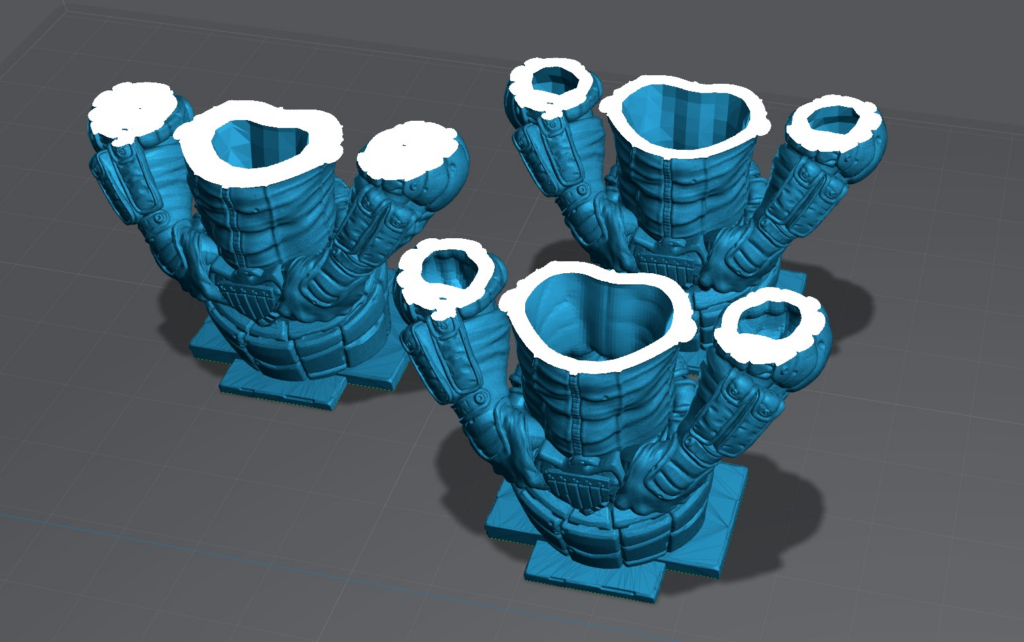
How thick the wall isIn this example the bust on the left is at 2mm, the busts on the right are at 1.8mm.
Quality
How many polygons are going to make up the inner walls of your model. The more polygons the higher the quality but this comes at a cost.
In this example the back of the bust is at a quality of 1 (min). The front bust is at 4 (max)
I’ve personally found 1.8mm thickness and 2.0 quality to be the best for most prints.
Suction Cups
Not to be confused with peel force or cross sections. Suction Cups are created when you have a void.
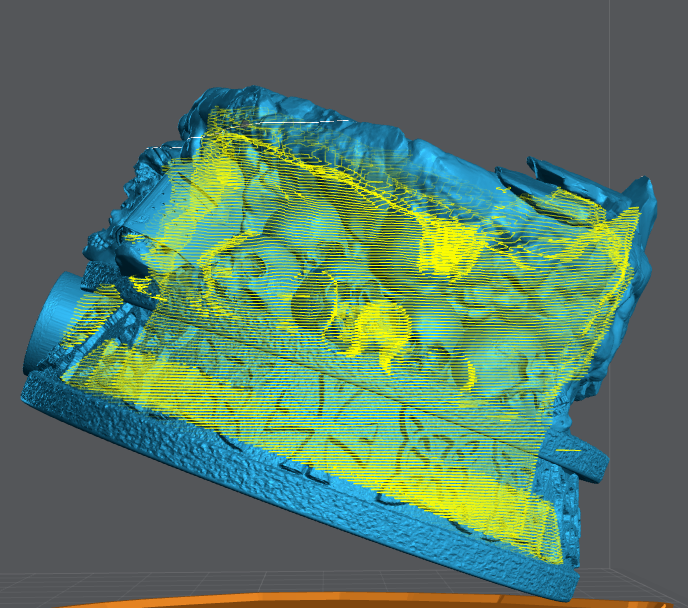
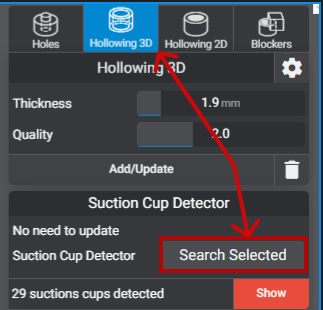
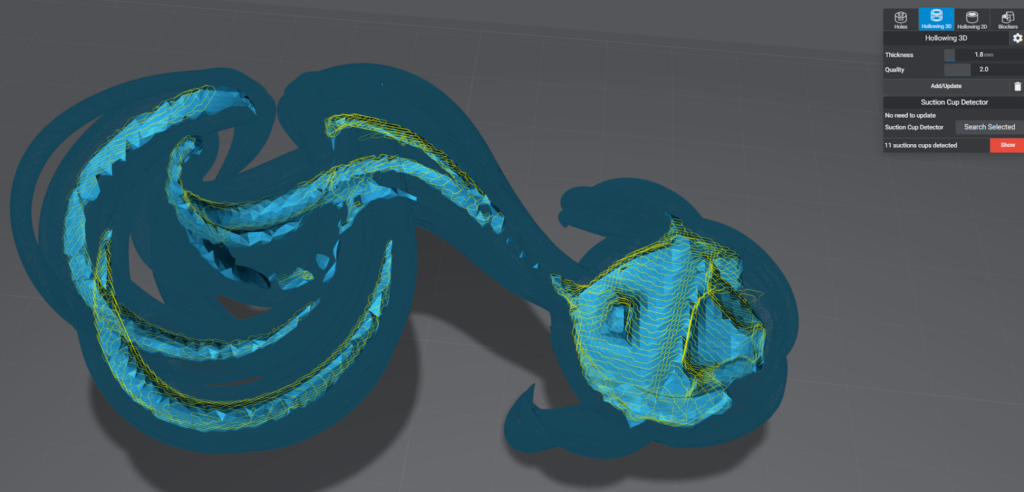
In this Example I used Lychee Suction Cup Detector. Available in the Pro version to highlight the in this print in yellow.
If you don’t have Lychee Pro you can use 3D Builder – Microsoft Apps.
Remember that every void is a suction cup and will need to be addressed if they are too large.
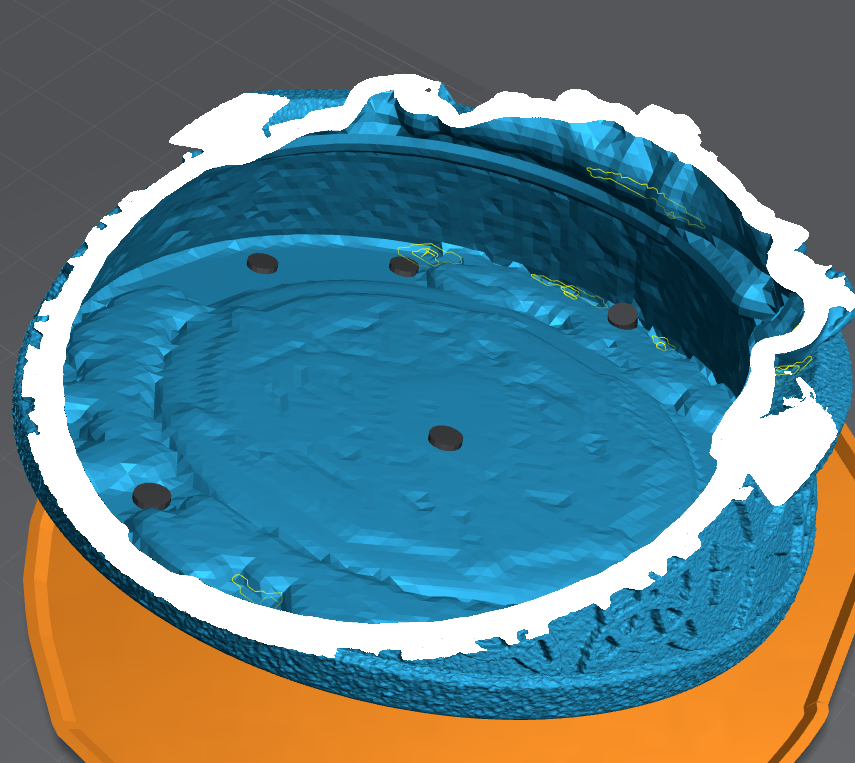
To prevent suction cups you need to place a drain hole in the lowest part possible. Adding holes as the print moves up will encourage good resin flow.
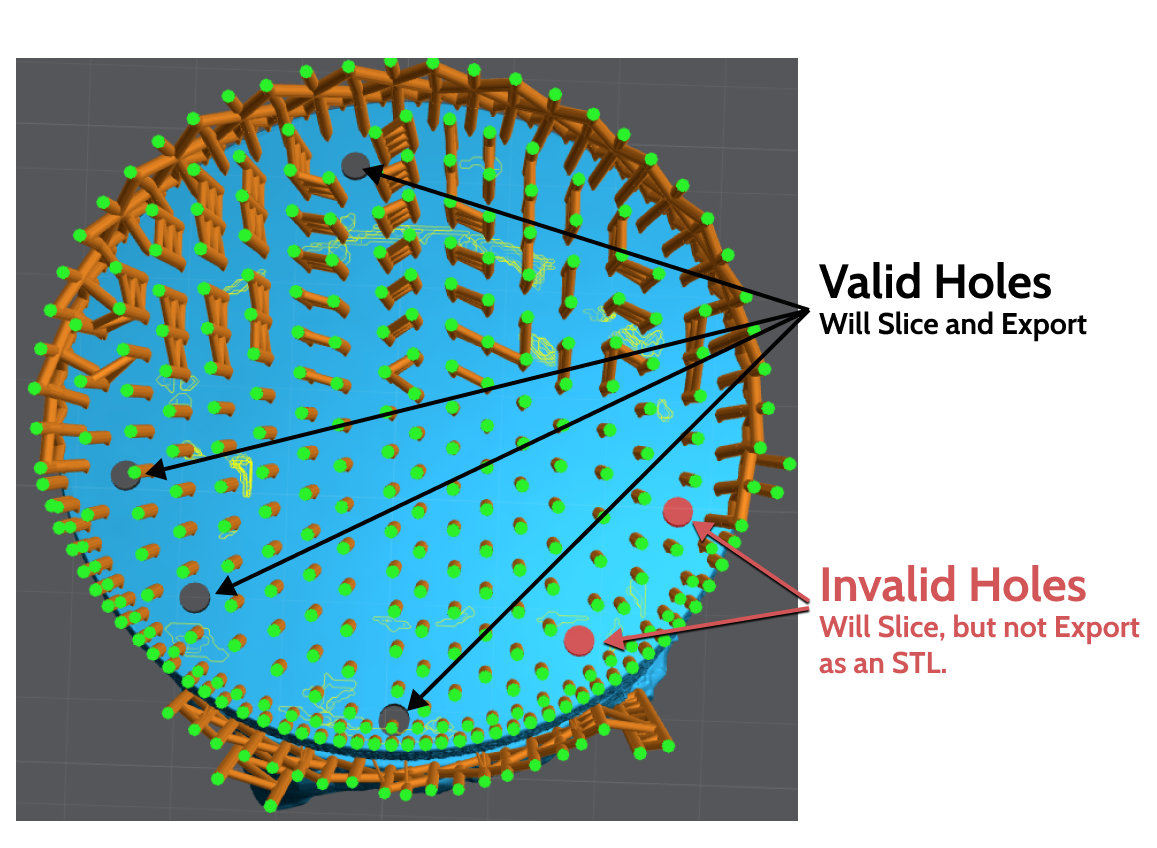
In these examples you can see I placed several drain holes. (The black and red cylinders).
Some holes will be RED this sometimes means that it’s against too much geometry and Lychee can’t Export it. If you try and save this file as a .stl the two red holes won’t be added.
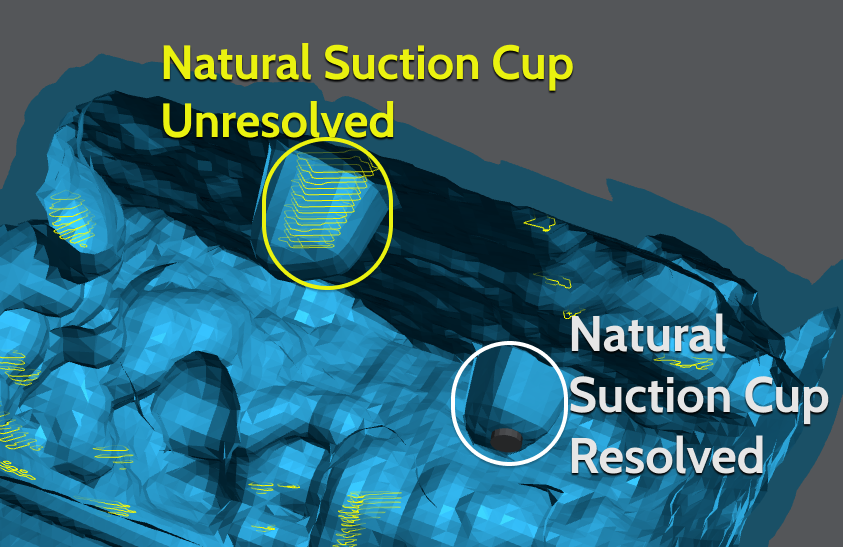
On the top of many models will have Natural Suction Cups. Not all of these can be resolved. However if you’re hollowing a simple hole into the main chamber should work.
Smaller suction cups, the ones you see in Yellow are ok. They won’t affect the print enough to cause any damage or lower success.
Blockers
Where a drain hole can’t be used, a blocker might be an option. Blockers only Block (prevent) hollowing. This means if the suction cup is created due to the shape of the model a hole must be used.
Blockers can also be very useful in removing resin traps. This is where you have a part of the model that’s large enough to be hollowed, but is surrounded by areas that are not.
In this example you can see all the holes that are not connected. A total of 11 different zones are created when hollowing this hair.
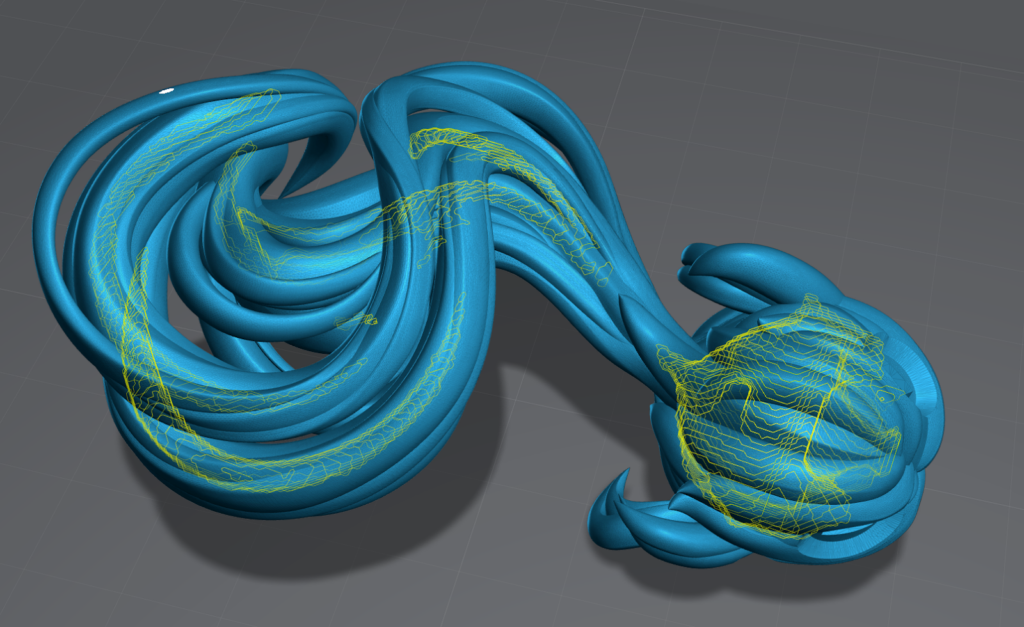
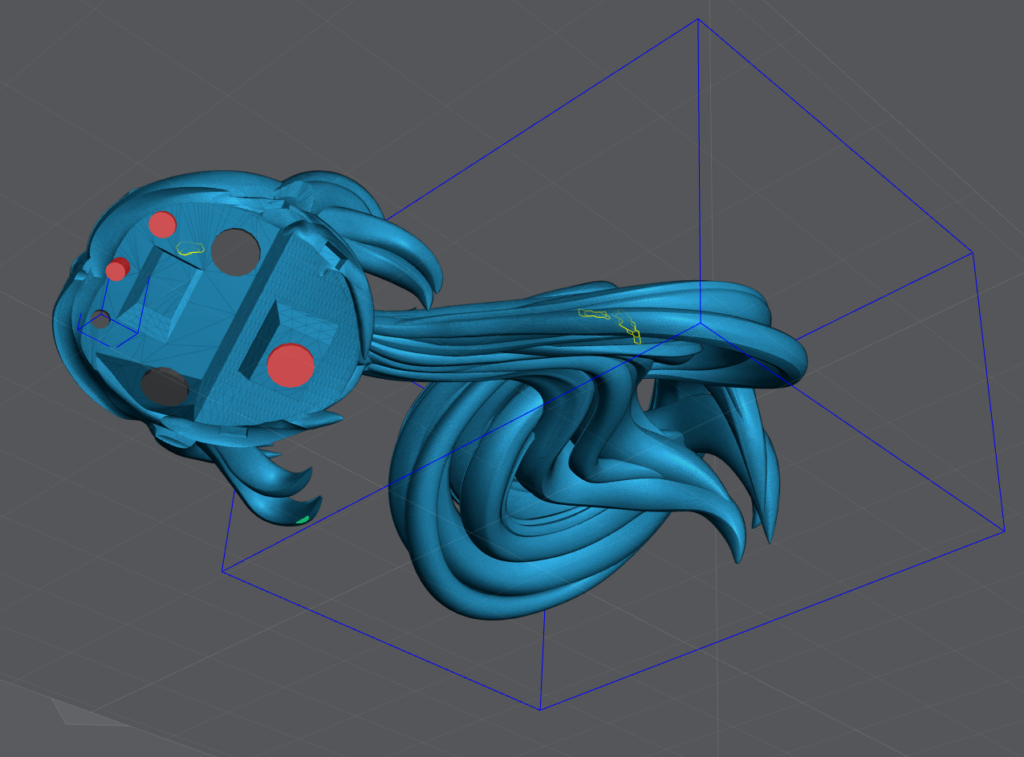
A few well placed Blockers, the 2 Blue boxes, and holes the Red and Black cylinders removed almost all the suction cups. The suction cup in the back could not be resolved with a blocker because it’s a void in the geometry. Only a hole can resolve this. However it’s too small to cause any issues.
When holes are RED this means that Lychee can’t export them as an .stl, however if sliced from the .lys it will function correctly.
Drain Holes
Needed to allow the resin to escape from the hollows parts of your model. I typically use as many as I can and I try to keep them over 2mm, but the model will dictate.
Always place them in an area that can’t be noticed, or is difficult to notice.
Always try and place 2 or more. At least one near the top of the model to allow draining during printing.
Drain holes need to be deep enough and/or angled to penetrate the wall of the model, but don’t come out the other side.
Hollowing on the plate
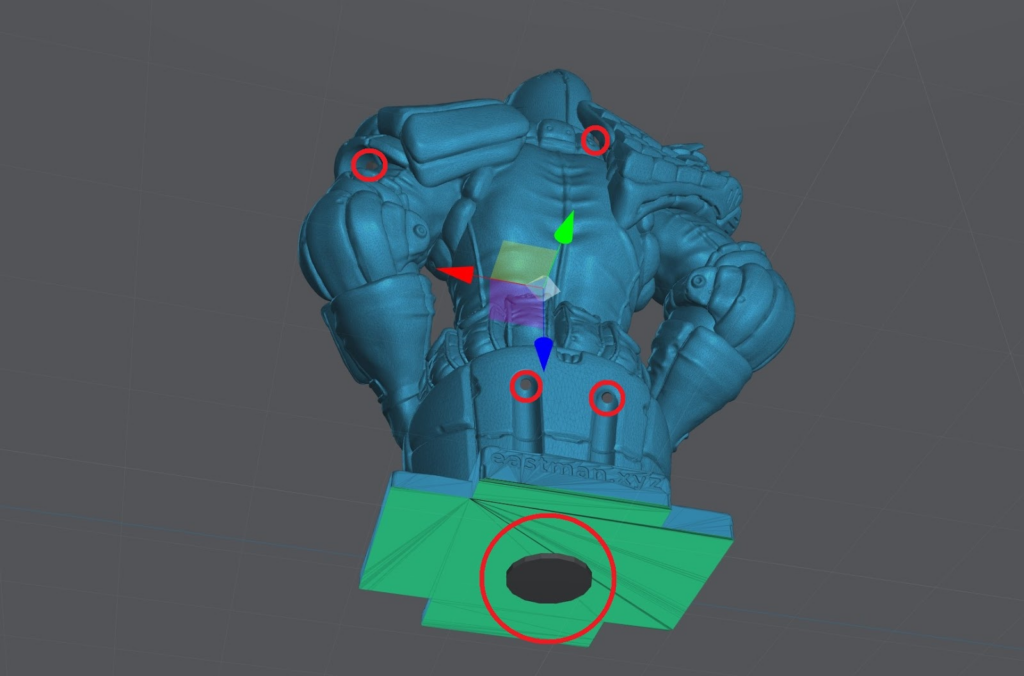
Some models are best built right onto the build plate but you still want to hollow them. This is difficult because the bottom hold won’t drain till after it’s been removed from the build plate. The trick is getting a minimum of 2 holes as close to the top of the print without causing any damage.
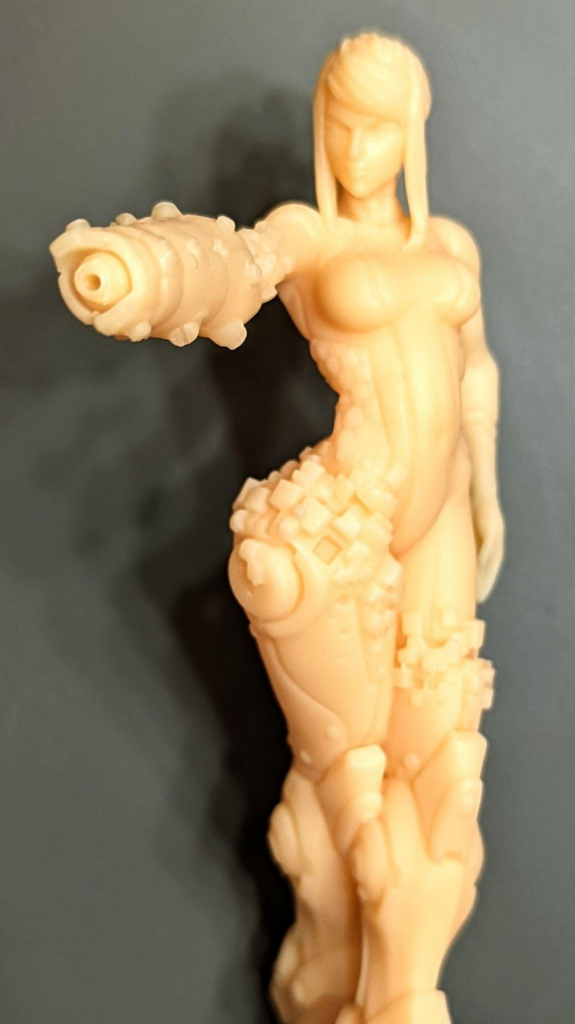
In this example I’ve snuck 5 drain holes into a single print model. Models that are done in one print are more difficult because you have no seams to hide the holes. This is where I find places that will be covered in shadows.
Here is the end result. Pictures taken under bright light and 4x magnification.
Internal supports
For larger objects you will need to add Internal supports.
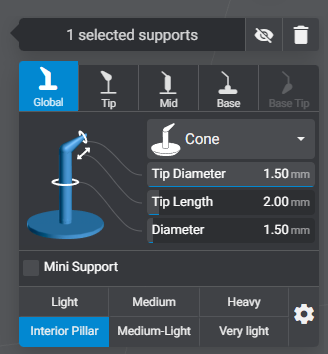
WIth Lychee Pro you can have up to 6 support profiles. I highly suggest making one of them an Interior Pillar.
IF you’re using another slicer or the Free version of Lychee modify my heavy support to have a 1.5mm shaft and 1.5mm tip. This way the entire support is now a pillar.
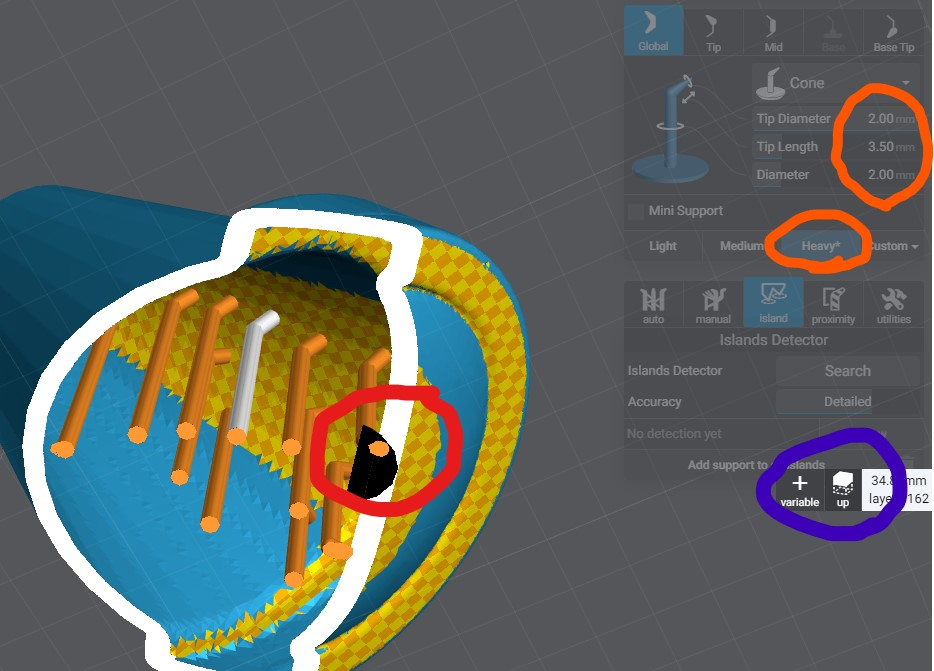
Next change the view so that you’re looking up under the model. There is a toggle on the layer slider.
Now you will support the inside of the model much but with far less support but much larger.
The objective here is to add some support on any large islands but not to small islands.
Finally support the “ceiling”, think of Dwarven or Roman architecture.
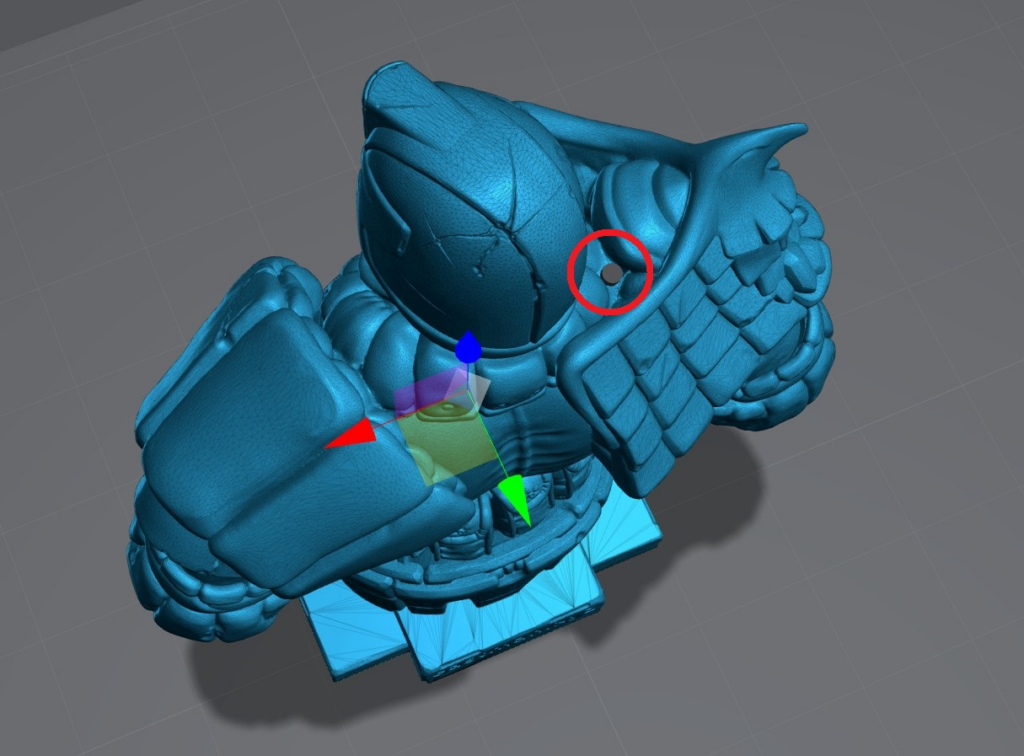
Make sure no supports end up going through a hollowing hole!
Last updated on