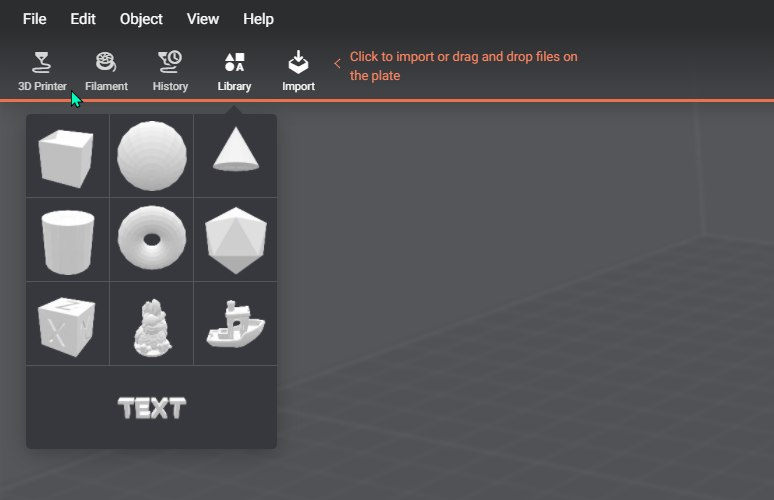
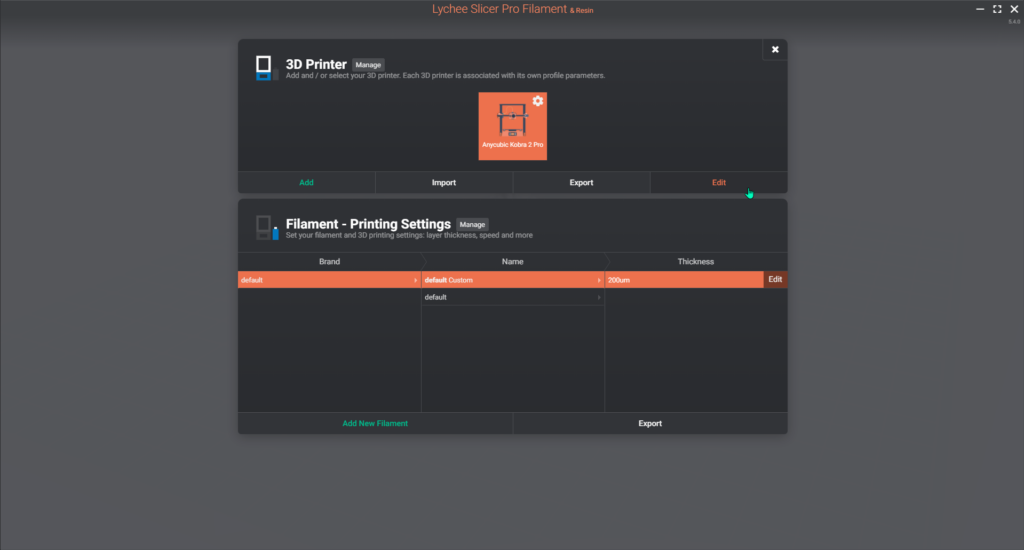
This menu in the Toolbar, allows your to add and select a printer. It also gives you access to your printer settings and to the Gcode itself, which you can update manually for more control over your print.
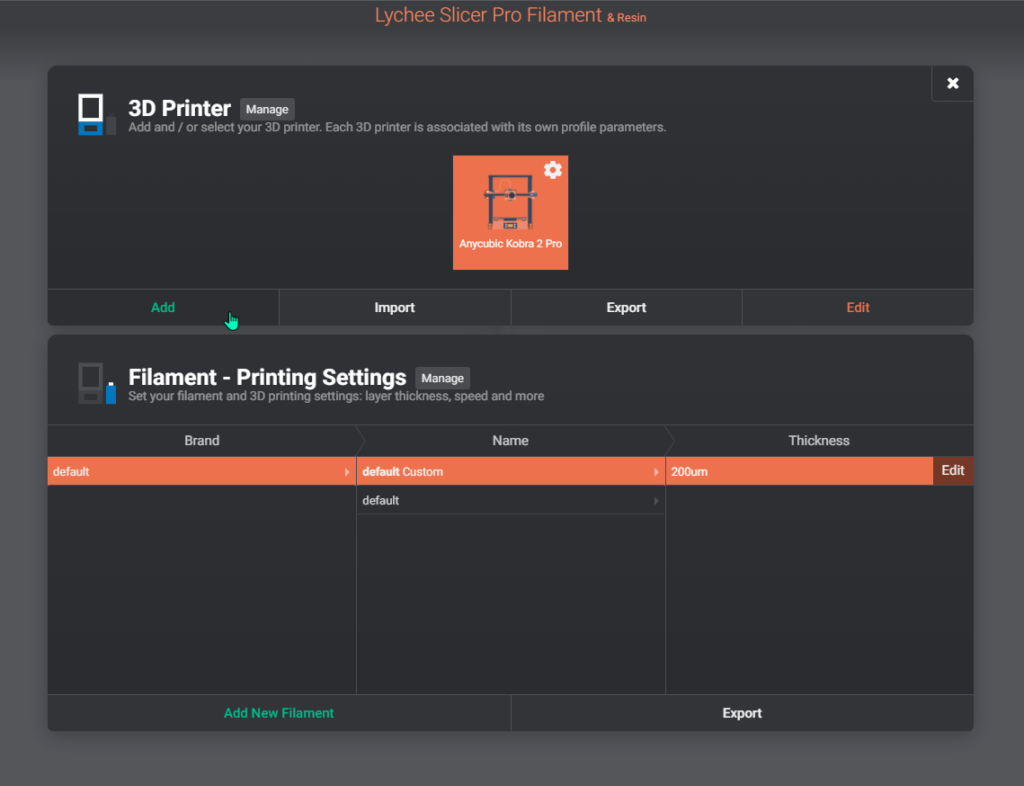
Add
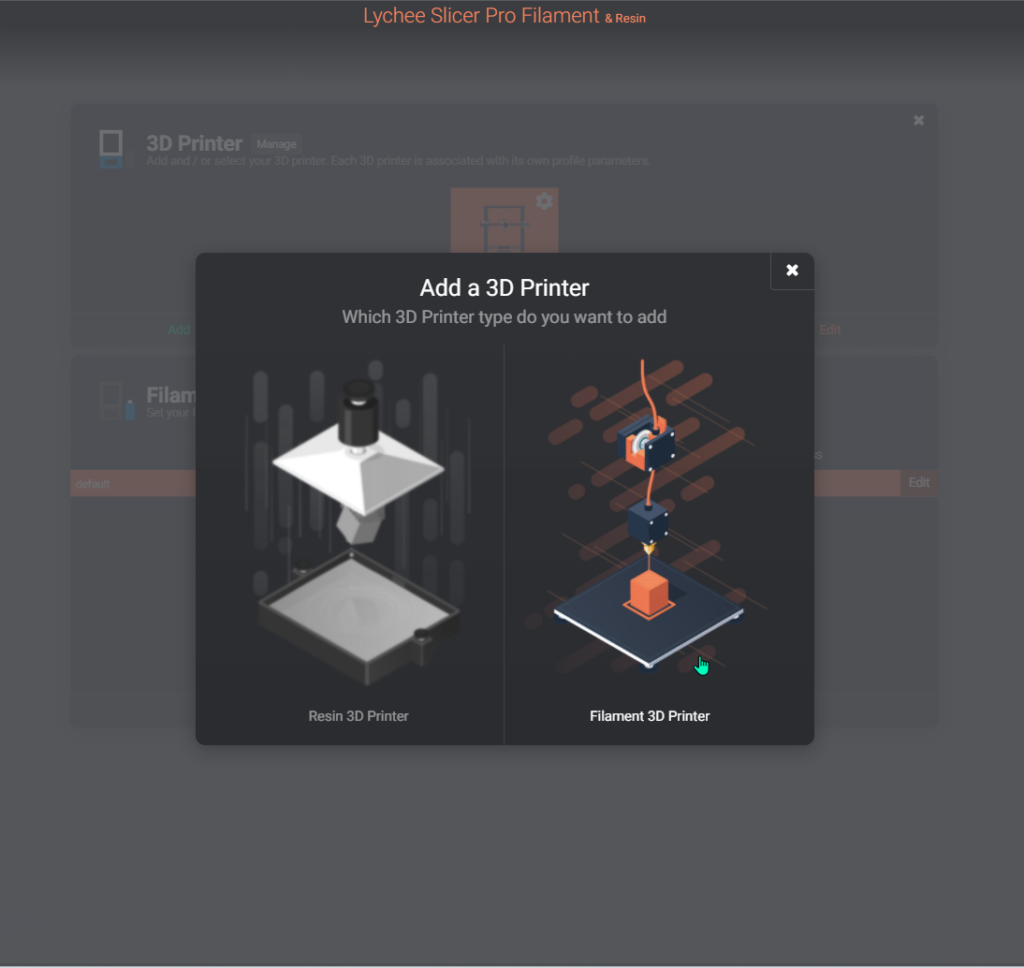
A button that allows you to add a machine. This applies to both resin and filament machines, which are of interest to us. Once you enter the filament printer section, you have two types of machines to choose from.
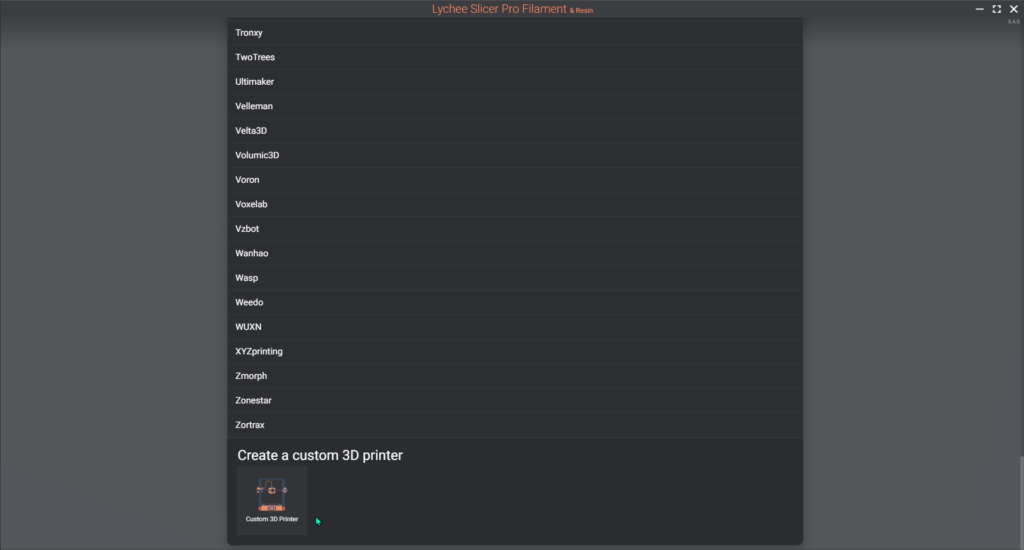
List of market printer :
A list of brands that includes a wide range of printer models available in the market. From the most common to professional machines, including open-source models, most machines are featured here. However, if you can’t find your specific model or if you’ve customized, modified, or built your own machine, another option is available to you.
Create a custom 3D printer :
This option enables you to configure your machine yourself, from its size to the extrusion system, movements, and speed. Everything is possible.
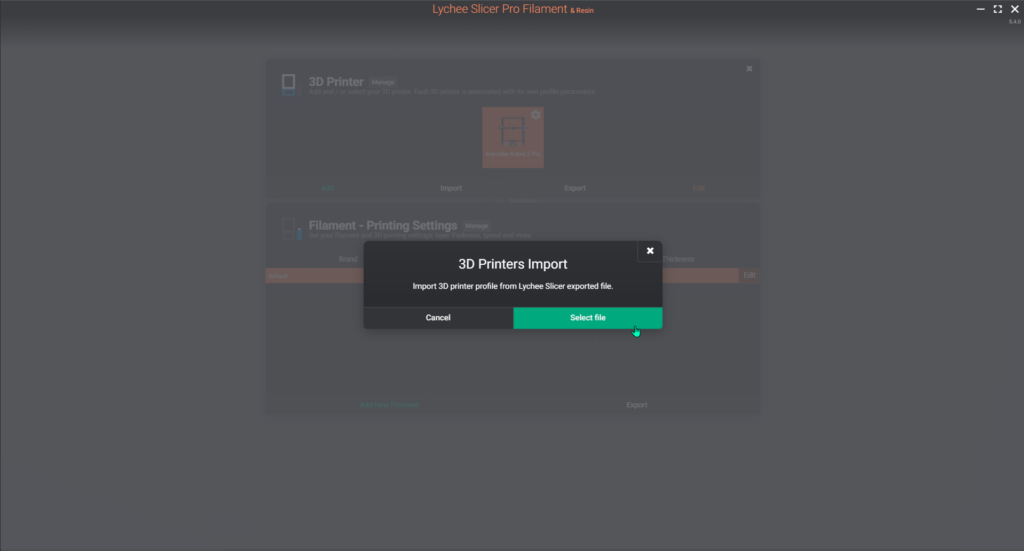
Import
This allows you to import one or more printer profiles with the option to import filament profiles as well, depending on your preference. The import file is a .lyp.
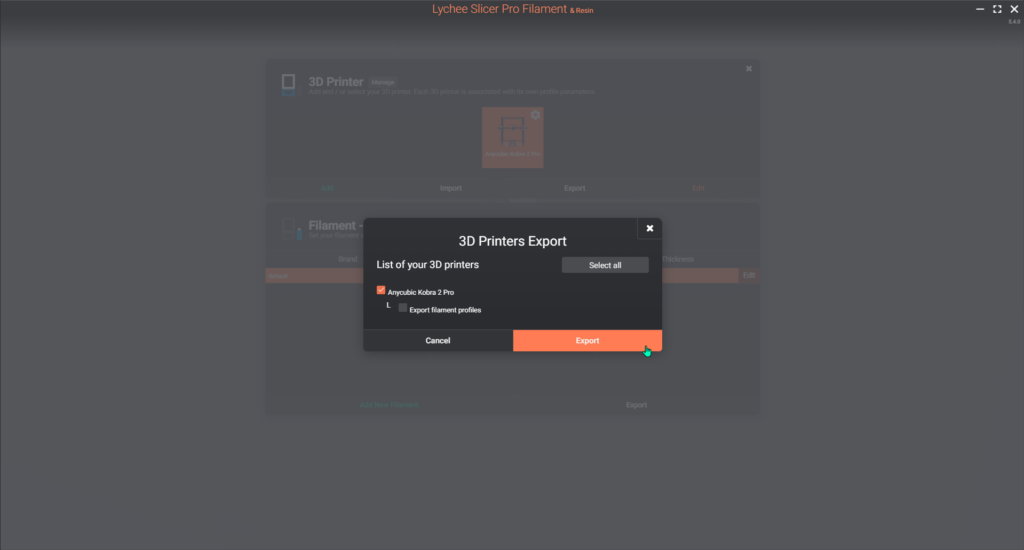
Export
To share your favourite printer profile with a friend or family member, you have the option to export one or multiple printer profiles to .lyp files. You can choose to include your filament profiles as well.
Edit
General
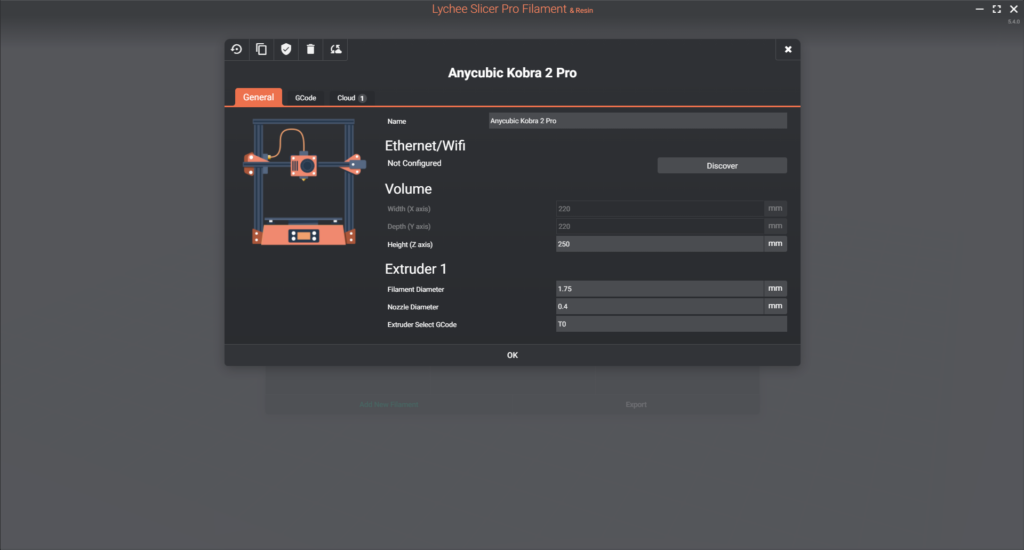
Name
This is a brief summary of your printer’s brand and model. To distinguish your printer, especially if you have multiple identical printers or simply want to assign a custom name to it, you can edit its name or add a numerical identifier.
Ethernet/Wifi
With Octoprint and Klipper-based machines, you can directly connect your printer to Lychee through the network, allowing you to transfer and initiate prints directly from the slicer. You can also control your machine using the web interface within Lychee and monitor it through the webcam preview. Octoprint machines are automatically detected on the network, but for Klipper machines, you can add them by entering your IP address in the “Find by IP” field.
Volume
This specifies the printing distance for each axis. On commercial printers, you can typically only modify the Z-axis (which can be useful if you’ve installed something at the top that limits its travel). However, on custom printers, you can adjust every axis.
Extruder
Filament diameter: This parameter specifies the diameter of the filament, which must match your setup since your extruder and hotend can only accept a specific filament size. The vast majority of printers (around 98%) use the standard 1.75mm filament, which is the norm for commercial printers. Some professional printers use 2.85mm or 3mm filament. You can adjust this diameter if you find yourself with a filament that has a smaller or larger diameter than what you purchased, or if you modify your printer.
Nozzle diameter: The nozzle orifice has a specific diameter that determines the width of your lines. Typically, you can print from 75% to 150% of this diameter (e.g., with a 0.4mm nozzle, you can print lines ranging from 0.3mm to 0.6mm). Most printers come with a standard 0.4mm nozzle, but if your printer has a special nozzle or you’ve changed it to print faster or achieve finer details, you can specify the new diameter, and the slicer will adjust all other parameters accordingly.
Extruder Select G-code: When using a printer with multiple printheads or a multi-colour system, you can specify which tool (printhead or nozzle) you want to use for printing. By default, all printers start with T0, representing the first printhead or nozzle. If your printer has only one printhead, or you’re not using a multi-material unit, you don’t need to modify this parameter.
Gcode
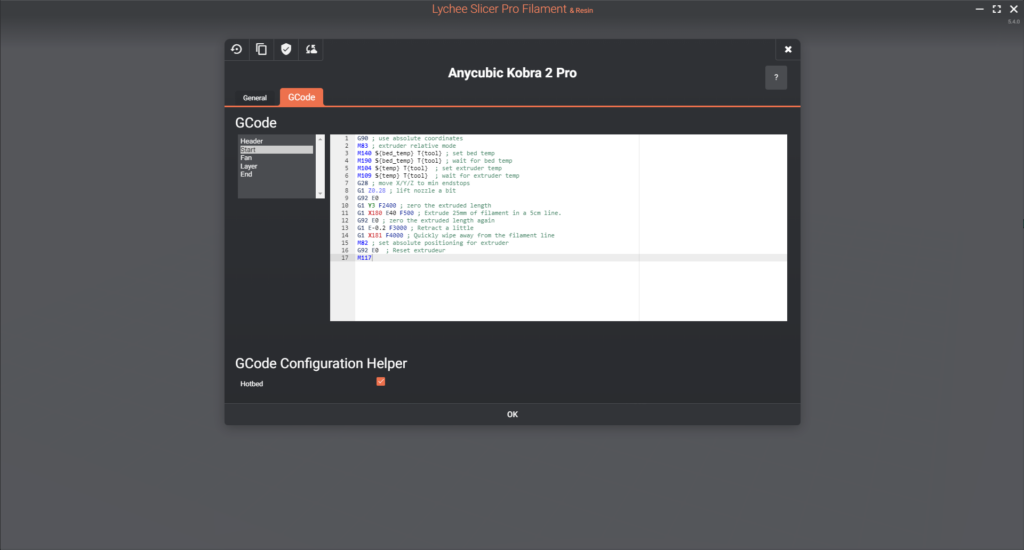
Header :
This section only specifies which version of Lychee you are using and the total number of layers. You can add comments starting with “;comment” to include personal notes in your G-code.
Start :
Basic:
All printers come with a predefined start G-code that heats up the bed and nozzle, homes the printer, and creates a purge line before printing. This setup is essential to prepare your printer for the printing process.
Checkmarks:
Various options are available in the start G-code.
Hotbed:
Specifies that the printer has a heated bed and adds the command to use it.
Bed leveling:
Post modern printers come with Automatic Bed Leveling (ABL) systems that measure the flatness of the first layer and make necessary adjustments for a perfect first layer. This checkmark activates or deactivates this probe before printing.
Side note:
If you want to use the bed mesh saved in your printer, you can add an “M420 S1” command just after the “G28.”
Set Max Acceleration:
This allows you to input custom acceleration values for each axis before printing. Most printers come with predefined and basic acceleration settings (e.g., 800 mm/s²), but you may want to increase this to reduce your printing time.
Set Jerk :
Also known as square corner velocity, this is the speed at which changes in direction or state transitions occur during printing. Most prints use a value around 8-10 mm/s, but you can slightly increase it for faster prints or decrease it for smoother corners.
Side note for Klipper-based printers using the START_PRINT macro:
Here’s an example of a start G-code:
START_PRINT BED_TEMP={bed_temp} EXTRUDER_TEMP={temp} SIZE={minx}_{miny}_{maxx}_{maxy}Different variables are used for heating the printer (bed_temp and temp for the bed and nozzle temperatures) and to define the print area (with Klipper, the size parameter allows you to probe only where it’s needed).
You may want to provide information about the total number of layers to Klipper. To do this, simply add the following line to your start G-code: SET_PRINT_STATS_INFO TOTAL_LAYER={layers+1}.
Here’s a little tip: Add an M82 command after specifying your START_PRINT if it’s not already included in your START_PRINT macro.
Fan :
This setting defines the command used to control the fan speed during printing. Most printers use the M106 S (fan speed) command. However, if you’ve built your own machine and are using a specific code to control the fan or have multiple fans to control, you may want to change this setting.
Layer :
Utility :
you can add various information to your G-code at every layer or specific layers.”
Add info :
allows you to include a progress counter in your G-code, which will display the progress on your printer screen.
Here’s an example:
M73 P{progress}
M117 Layer {layer+1} on {layers+1}
;LAYER_CHANGE
;Z:{height}
;{layer+1} on {layers+1}
This code provides the following information:
- M73 P{progress} displays the percentage of progress.
- M117 Layer {layer+1} on {layers+1} indicates which layer is currently being printed and how many total layers there are.
- ;LAYER_CHANGE marks the beginning of a new layer.
- ;Z:{height} specifies the height of the layer.
- ;{layer+1} on {layers+1} reiterates which layer is currently printing and how many total layers there are. This can be useful for tracking or resuming a print.
Color Change :
You can use the “Change color” feature to add color change or pause commands in your G-code. Here’s an example of how to use this command:
;; IF { layer+1 == 6 }
M600 ; Color change command at layer 6
;; ELIF { layer+1 == 20 }
M0 ; Pause command at layer 20
;; ELSE
;; END
In this example, a color change command (M600) is inserted at layer 6, and a pause command (M0) is added at layer 20. You can customize the layer numbers and commands according to your specific printing requirements.
Change fan speed for the first layer :
You can adjust the fan speed for the first few layers using the following code to ensure a smoother increase:
;; IF { layer >= 0 && layer <= 1 }
M106 S0 ; Fan speed set to 0 in the first layer
;; ELIF { layer >= 1 && layer <= 3 }
M106 S{fan_speed*0.4} ; Gradual increase to 40% of the fan speed
;; ELIF { layer >= 3 && layer <= 5 }
M106 S{fan_speed*0.8} ; Gradual increase to 80% of the fan speed
;; ELIF { layer >= 5 && layer <= 6 }
M106 S{fan_speed} ; Set to the maximum fan speed defined in your profile
;; ELSE
;; END
This code gradually increases the fan speed from the first to the 6th layer, reaching the maximum fan speed defined in your profile. You can adjust the layer ranges and fan speed values as needed for your specific printing requirements.
Limit/Change Speed:
You can control and gradually increase the printing speed in the first few layers to ensure proper printing of delicate geometries using this code:
;; IF { layer >= 1 && layer <= 2 }
M220 S40 ; Set the print speed to 40% in layers 1 and 2
;; ELIF { layer >= 2 && layer <= 4 }
M220 S80 ; Gradual increase to 80% in layers 2 to 4
;; ELIF { layer >= 4 && layer <= 5 }
M220 S100 ; Increase to 100% in the 5th layer
;; ELSE
;; END
This code allows you to carefully adjust the printing speed for the first 5 layers of your print. You can modify the layer ranges and speed values as needed for your specific printing requirements.
End:
The end Gcode defines what happens when your print is finished. Most printers have a default G-code that turns off the heating of the hotend/nozzle and bed, raises the Z-axis slightly, and parks the print head in the left corner. You can easily modify the parking position by changing this line:
G1 X0 Y{top} F1200 ; end moveSide note for Klipper-based printers:
If you’re using Klipper, you can add your PRINT_END macro here, replacing the old G-code.
In doubt, or if you have questions about the Gcode, you are welcome to join us on our Discord server to share your questions with our Filament specialists and other Lychee Slicer users https://mango3d.io/discord
Cloud
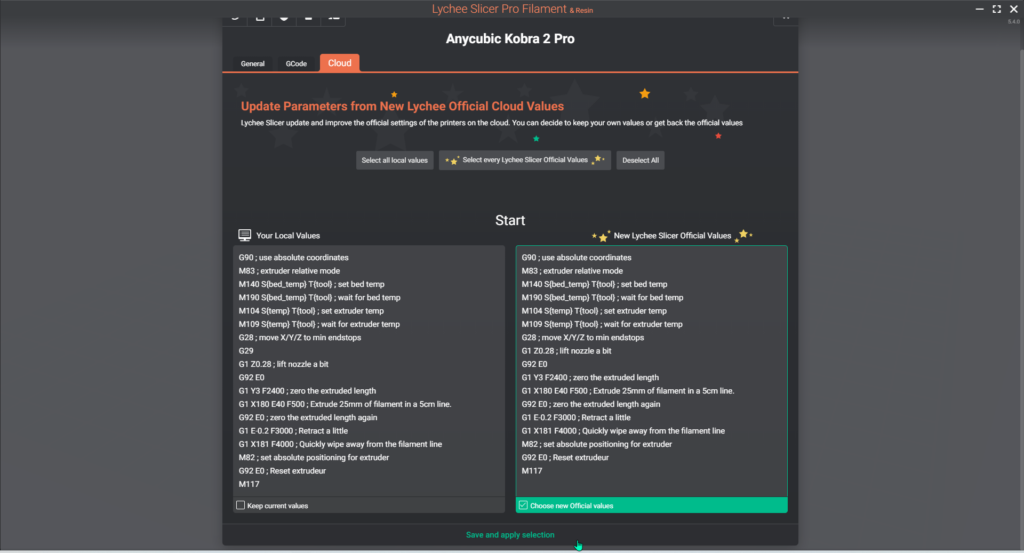
This menu allows you to compare your local printer configuration with the default/cloud configuration of your printer and import the settings that are in the cloud to your local setup, essentially restoring the default parameters. It’s useful when you’ve made changes and want to revert to your basic configuration without losing your filament profiles, or when updates are made to optimize the G-code and add new features.
Last updated on
Tags: FDM