The steps you follow to create your supports will depend on your preferred workflow but also on the complexity of your model and the tools available to you. Lychee Slicer Pro provides additional features that can save you time and filament. (See the Free / Pro comparison to know more about the other extra features)
In Prepare, go to Supports, beneath Override, on the left-handside menu.
The Supports toolkit will appear on the right of the screen
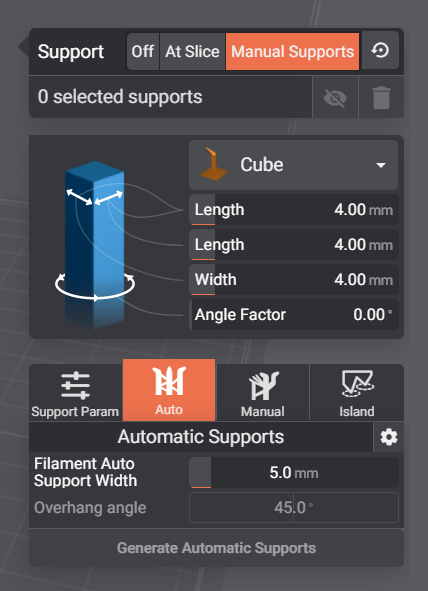
The top section indicates which menu you are in: Off, At Slicer or Manual Support. It opens to Manual Support by default and if you use the reset arrow button on the right, the menu will revert to Manual Support.
Underneath are the Support size settings. You can select your support type. Note only Cube supports are available at this time. More Support types will be added soon.
You can customise the Lengths and Width as well as the Angle Factor. This is the angle the cube will be placed/oriented in relation to your model.
Below are 4 different Support tools: Support Param: provides addtional support customization. Auto: Provides automated supports based on the Overhang of your model.
Manual: Allows you to manually add supports one by one or using Support Painting and Inline Supports of added efficiency. Island: The Island Detector helps you identify islands and add supports where needed in one click.
Last updated on